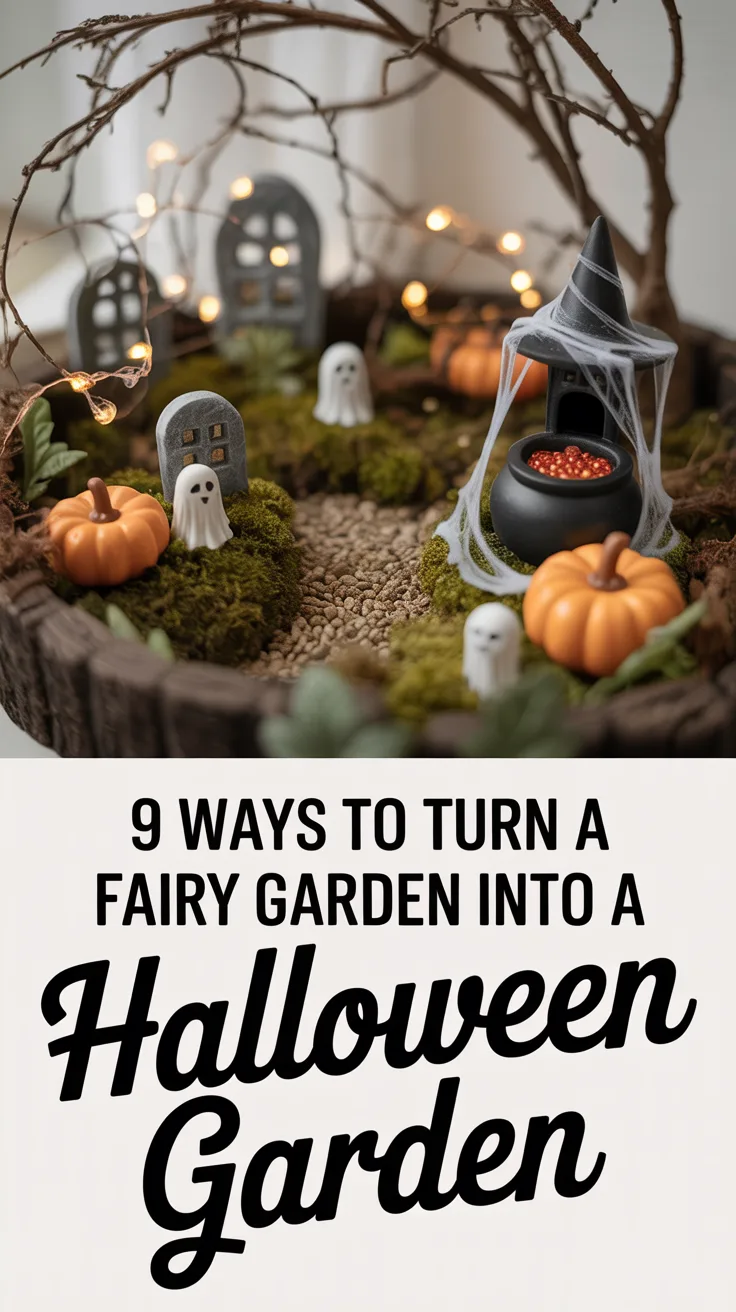

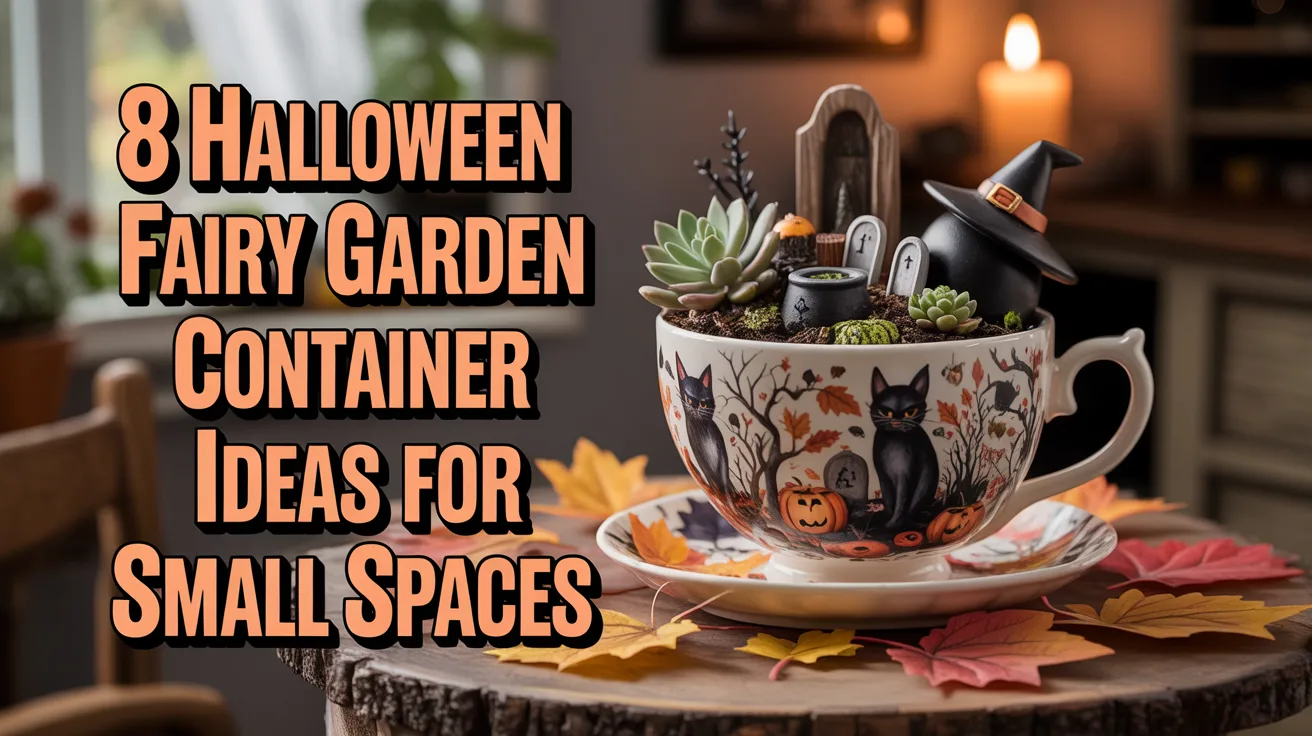
A Halloween fairy garden does not need a full garden bed or even a large patio. For a small-space version, think in terms of container gardening: a 10- to 18-inch planter, window box, shallow bowl, small wooden crate, or compact raised container that provides enough room for plants and a miniature scene.
That distinction matters because a fairy garden still needs enough surface area to look like a tiny landscape. Very small vessels such as ordinary teacups can hold a miniature plant or decorative vignette, but they generally do not provide enough usable space for the pathways, structures, plants, and accessories most people expect from a fairy garden.
The ideas below are sized more realistically for apartment balconies, porch steps, patios, decks, entryways, and other places where floor space is limited.

View on AmazonAs an Amazon Associate, I earn from qualifying purchases.
View on AmazonAs an Amazon Associate, I earn from qualifying purchases.
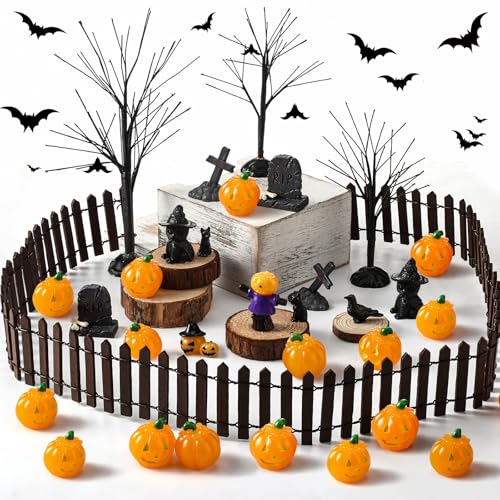
You can build several of these projects with a Halloween fairy garden miniature set.
How Small Can a Fairy Garden Actually Be?
For a recognizable miniature landscape, a container approximately 10 to 12 inches across is a practical starting point. This provides room for one or two compact plants, a small focal accessory, and a short pathway without forcing everything together.
A container around 14 to 18 inches across gives you considerably more freedom. At that size, you can usually create distinct areas such as a tiny haunted house, graveyard, pumpkin patch, or pathway while still keeping the overall garden compact.
Depth matters too. If you are using live plants, choose a container deep enough for their root systems rather than selecting it solely for appearance.
A Simple Small-Space Formula
- 10-12 inch container: One focal feature, one or two small plants, and a few accessories
- 14-18 inch container: One main structure, several plants, a pathway, and multiple miniature details
- Window box: A narrow linear scene ideal for balconies and windowsills
- Vertical setup: Several individual container scenes stacked upward when floor space is especially limited
Basic Supplies
You do not need to purchase everything specifically for a fairy garden. Small stones, twigs, bark, gravel, and suitable plants can provide much of the landscape.
- Container with appropriate drainage
- Potting mix suited to your plants
- One to three compact plants
- Fine gravel or small stones
- Miniature haunted house, fairy door, or other focal piece
- Tiny pumpkins
- Miniature tombstones
- Small twigs
- Decorative moss if desired
- Miniature fencing
- Optional battery-operated miniature lights
A set of miniature Halloween fairy garden accessories can supply the small-scale pieces for several containers.
1. 12-Inch Haunted Graveyard Planter
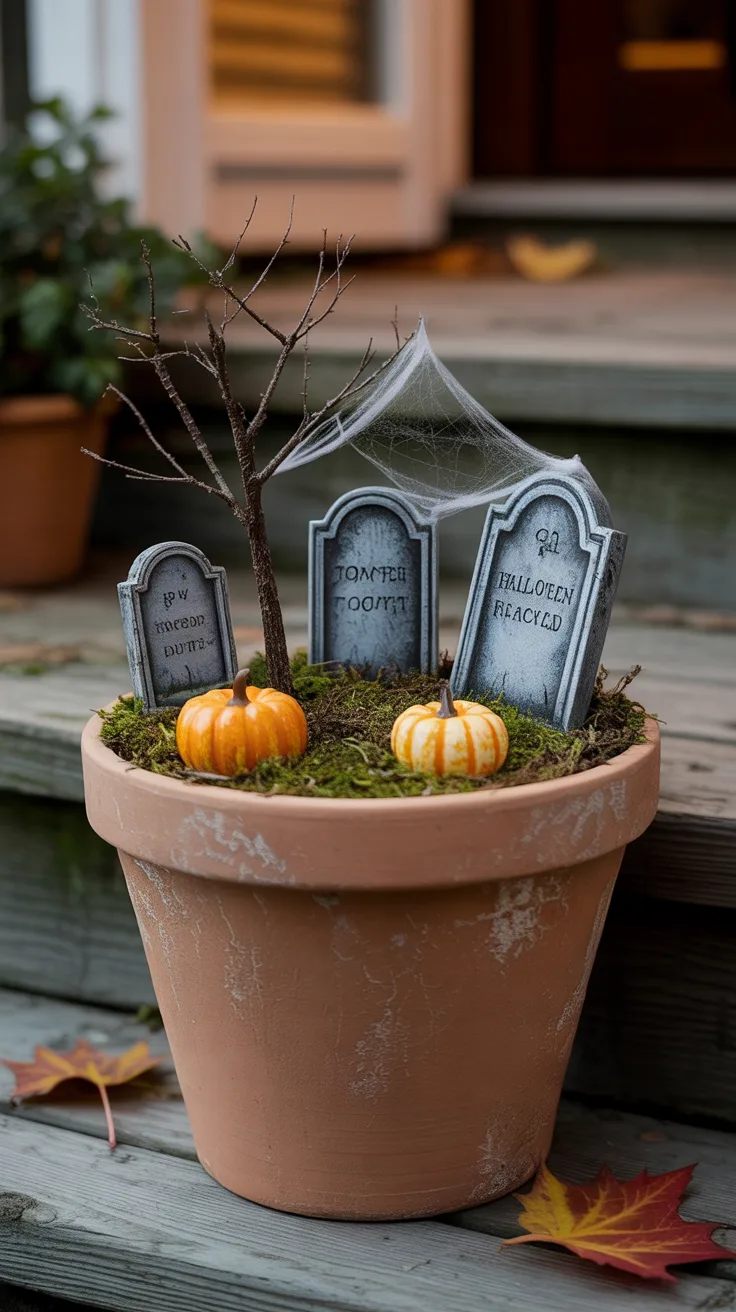
A standard 12-inch flowerpot or bowl planter is one of the most practical choices for a small Halloween fairy garden. It is compact enough for a balcony or porch step while providing enough surface area to create a recognizable miniature cemetery.
What You’ll Need
- 10- to 12-inch planter with drainage
- Potting mix
- One or two compact plants
- 3 to 5 miniature tombstones
- Short section of miniature fencing
- Fine gravel
- Small twigs
- 2 or 3 miniature pumpkins
How to Create It
- Fill the planter with the potting mix required by your chosen plants.
- Position the plants toward the back or one side rather than in the center.
- Leave approximately half of the visible soil available for the miniature scene.
- Create a narrow curved pathway with fine gravel.
- Place several tombstones along one side of the path.
- Add a short section of fencing behind the tombstones.
- Push one or two branching twigs into the soil to resemble bare trees.
- Finish with a few tiny pumpkins near the pathway.
Keep It Realistic: Do not try to fit a haunted house into this arrangement unless it is extremely small because the tombstones and pathway already provide the focal scene.

View on AmazonAs an Amazon Associate, I earn from qualifying purchases.

View on AmazonAs an Amazon Associate, I earn from qualifying purchases.
2. 16-Inch Haunted House Bowl Garden
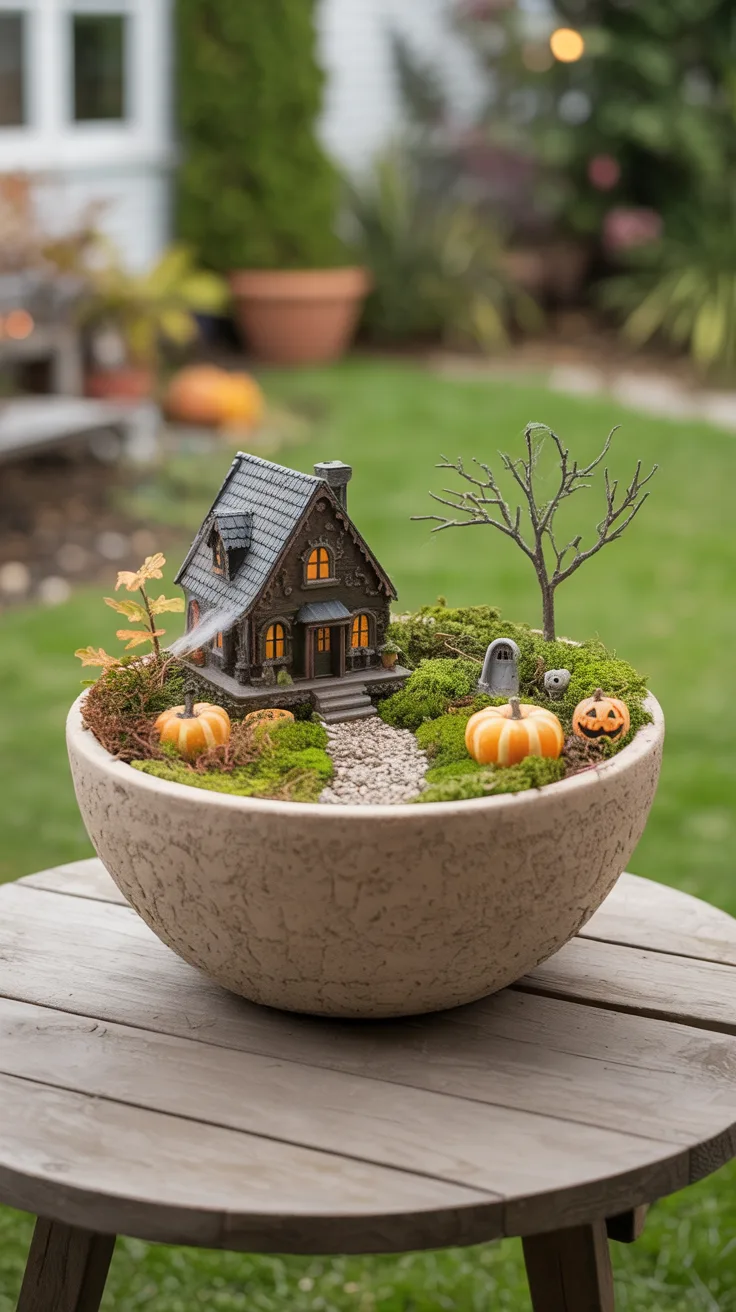
If you want an actual miniature building in your Halloween fairy garden, move up to a wider container. A 14- to 16-inch bowl planter gives a small haunted house enough breathing room to look like part of a landscape rather than an object squeezed between plants.
What You’ll Need
- 14- to 16-inch shallow planter
- Potting mix
- Two or three compact plants
- Small haunted house
- Fine gravel
- Tiny pumpkins
- Miniature fence
- Small stones
How to Create It
- Fill the planter and position the largest plant toward the rear.
- Place the haunted house slightly off-center rather than directly in the middle.
- Add smaller plants around the back and sides of the house.
- Leave the front third of the planter relatively open.
- Create a curved gravel path from the front edge to the house.
- Place several tiny pumpkins beside the path.
- Add a short fence or a few stones to define one side of the garden.
Limiting this arrangement to one building makes the miniature landscape easier to read and prevents a small planter from looking overcrowded.

View on AmazonAs an Amazon Associate, I earn from qualifying purchases.

View on AmazonAs an Amazon Associate, I earn from qualifying purchases.
3. Narrow Halloween Fairy Garden Window Box
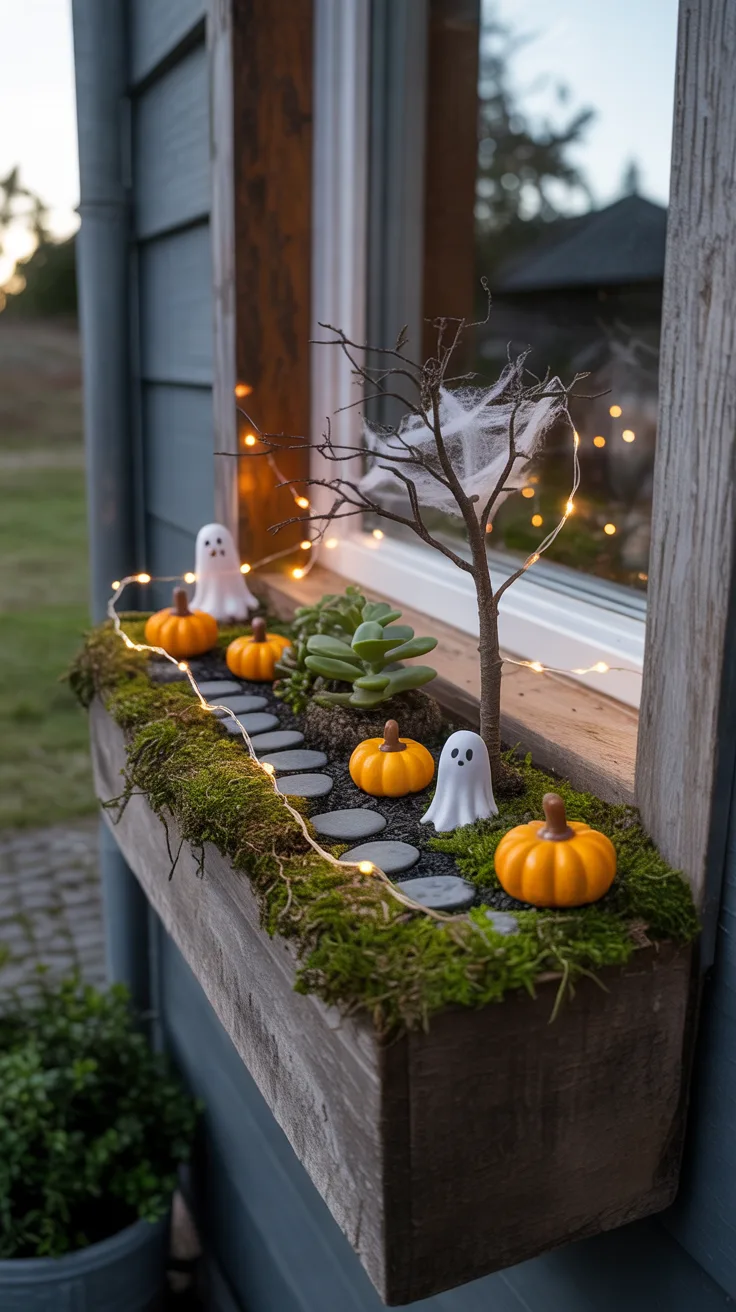
A window box is one of the best choices when the available space is long and narrow rather than square. It can sit on a balcony ledge, windowsill, railing shelf, or narrow outdoor table while taking up relatively little depth.
What You’ll Need
- 24- to 30-inch window box
- Suitable potting mix
- Three or four compact plants
- Miniature fairy door or small house facade
- Miniature pumpkins
- Fine gravel
- Small fence sections
- Twigs or bark
How to Create It
- Plant compact greenery along the back of the window box.
- Leave several open sections between plants instead of creating one continuous row.
- Place a fairy door or small house facade against the rear of the planter.
- Create a gravel pathway across part of the front.
- Add tiny pumpkins in two or three clusters.
- Use short fence sections to separate miniature areas.
- Add small twigs or bark pieces for natural texture.
A facade or fairy door takes up less space than a freestanding miniature house, making it especially useful in narrow containers.
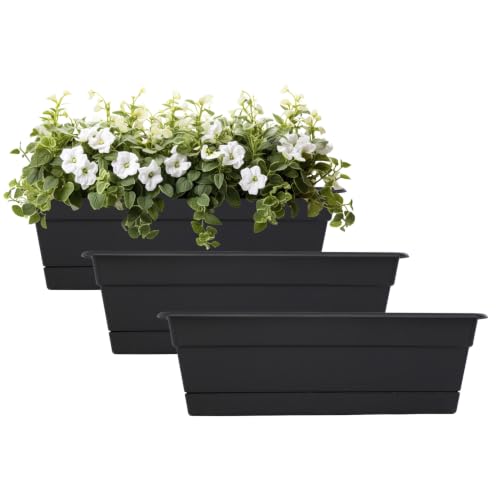
View on AmazonAs an Amazon Associate, I earn from qualifying purchases.
View on AmazonAs an Amazon Associate, I earn from qualifying purchases.
4. 12-Inch Witch’s Cauldron Garden
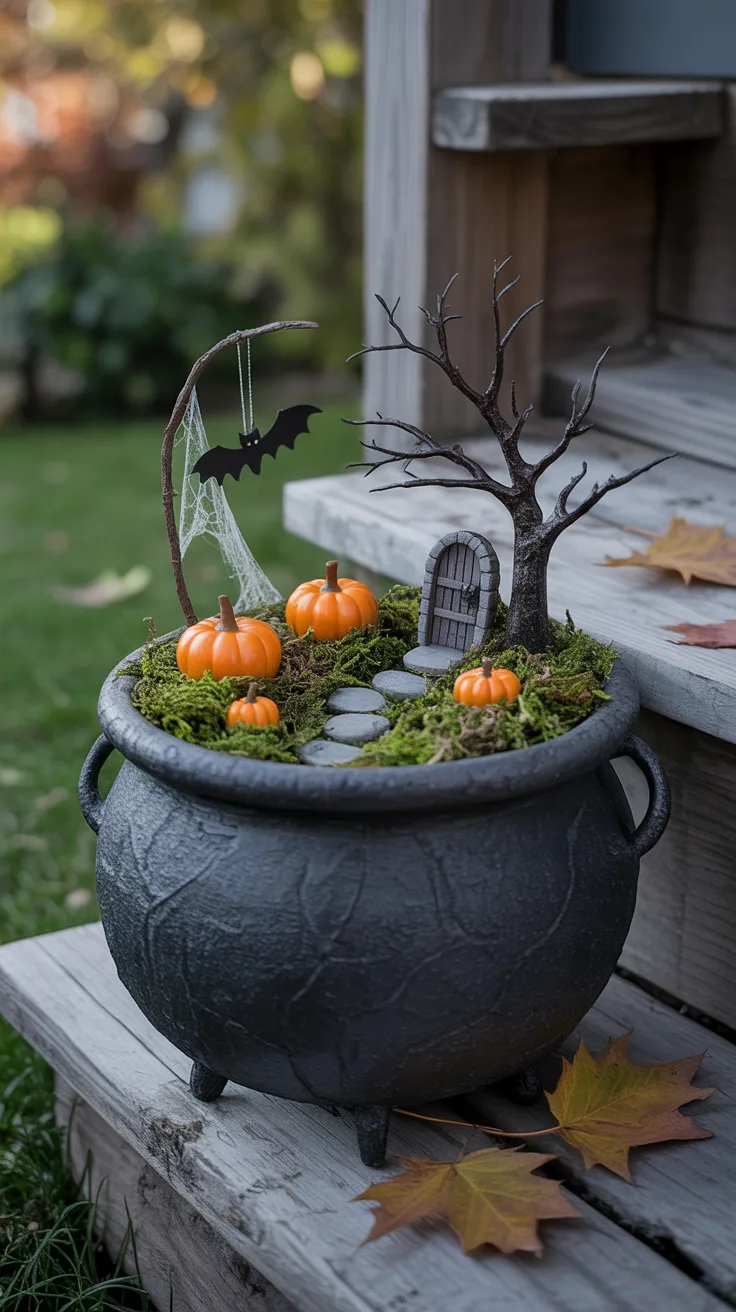
A small black planter, metal bucket, or cauldron-shaped container can become the theme itself. Because the container already communicates Halloween, the miniature landscape inside can remain simple.
What You’ll Need
- Approximately 12-inch black planter or suitable bucket
- Potting mix
- One compact upright plant
- One low-growing plant
- Miniature cauldron
- Tiny broom
- Miniature pumpkins
- Small stones
How to Create It
- Make sure the container provides appropriate drainage.
- Plant the taller specimen toward the back.
- Add the smaller plant along one side.
- Create an open area with small stones in the front half.
- Place the miniature cauldron in this clearing.
- Lean the broom against a twig or the side of the container.
- Add two or three pumpkins without covering the remaining open ground.
This is a good choice for a porch step because the entire project occupies approximately the same footprint as an ordinary potted plant.
5. 14-Inch Pumpkin Patch Bowl
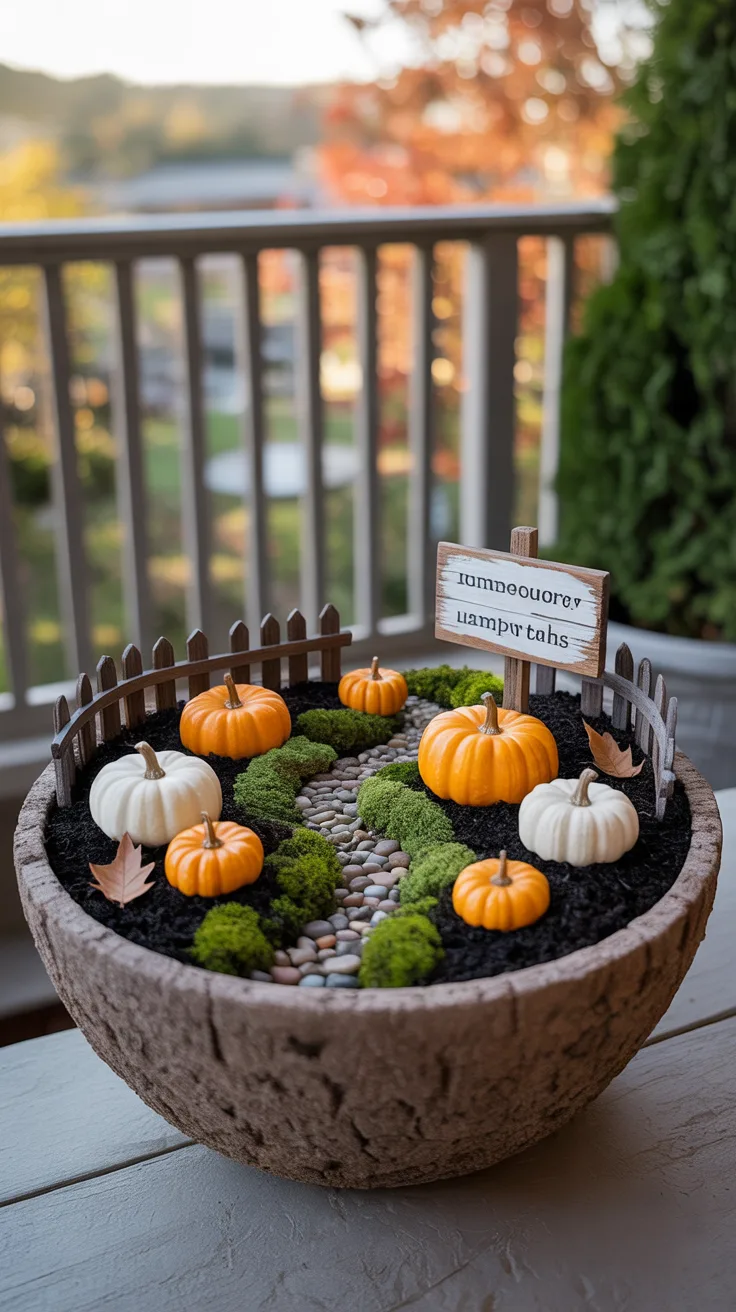
A shallow 14-inch planter provides enough horizontal space for a miniature pumpkin patch while remaining compact enough for a small patio table or balcony.
What You’ll Need
- 12- to 14-inch bowl planter with drainage
- Suitable potting mix
- Two or three small plants
- 8 to 12 miniature pumpkins
- Fine gravel
- Miniature fence
- Tiny sign
- Several twigs
How to Create It
- Plant the greenery around the rear third of the bowl.
- Create a curved gravel path through the center.
- Group the pumpkins in clusters of two or three rather than arranging them in rows.
- Install a short fence around one pumpkin cluster.
- Add a miniature sign near the front of the path.
- Use one or two twigs as miniature trees or fence posts.
Keep the pumpkins relatively small compared with the planter because oversized miniature accessories can make a compact fairy garden lose its sense of scale.
6. 16-Inch Faux Pumpkin Fairy House
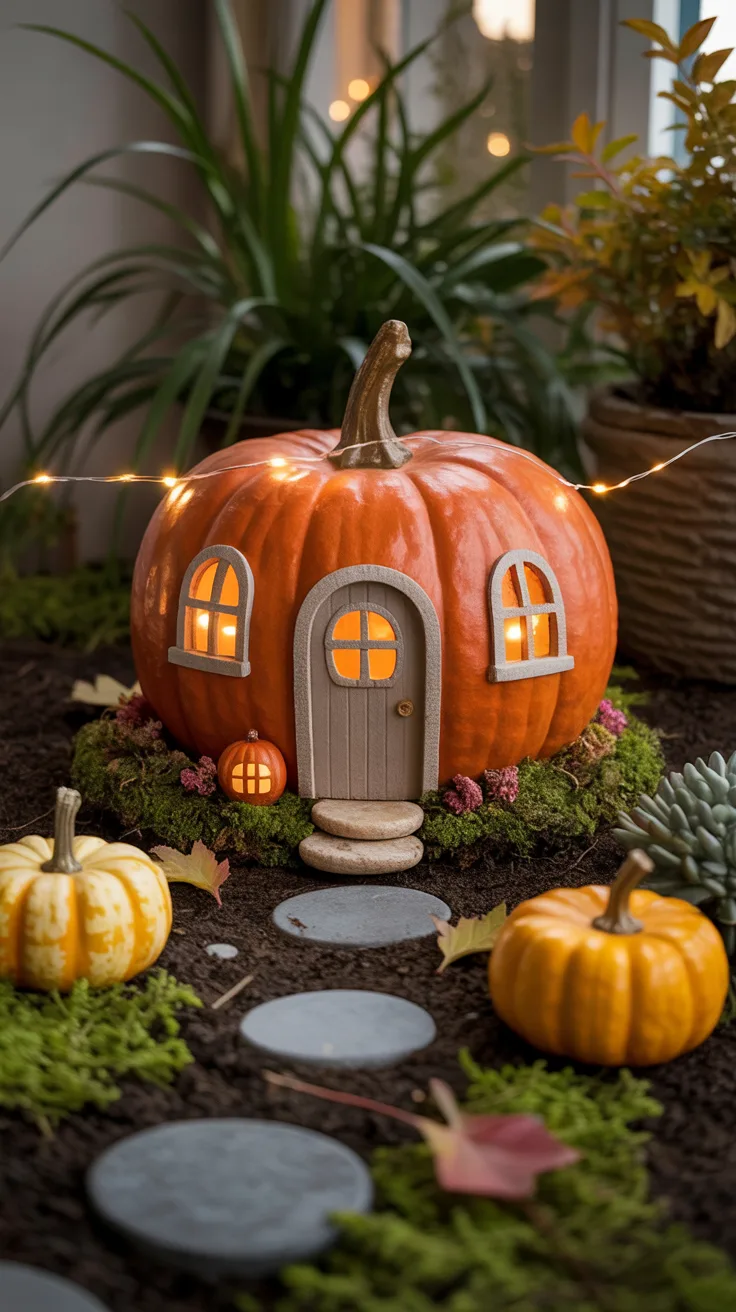
A large faux pumpkin can work as a small-space fairy garden because the container and haunted structure become one object. Unlike a tiny teacup, a pumpkin approximately 14 to 16 inches wide can provide enough interior or top-opening space for a simple miniature scene.
What You’ll Need
- Large hollow faux craft pumpkin
- Small removable planter or artificial greenery
- Miniature door
- Miniature windows
- Small stones
- Decorative moss
- Tiny pumpkins
- Battery-operated miniature light
How to Create It
- Cut a large viewing opening into one side of the faux pumpkin.
- Place a removable container inside if you want to use living plants.
- Attach a small door and windows to create the appearance of a miniature home.
- Build a short stone pathway outside the entrance.
- Add decorative moss around the base.
- Place two or three miniature pumpkins beside the door.
- Position a battery-operated light where it can illuminate the interior without being buried in soil.
A large carvable faux pumpkin can provide enough room for a reusable miniature Halloween scene.
7. Three-Tier Small-Space Fairy Garden
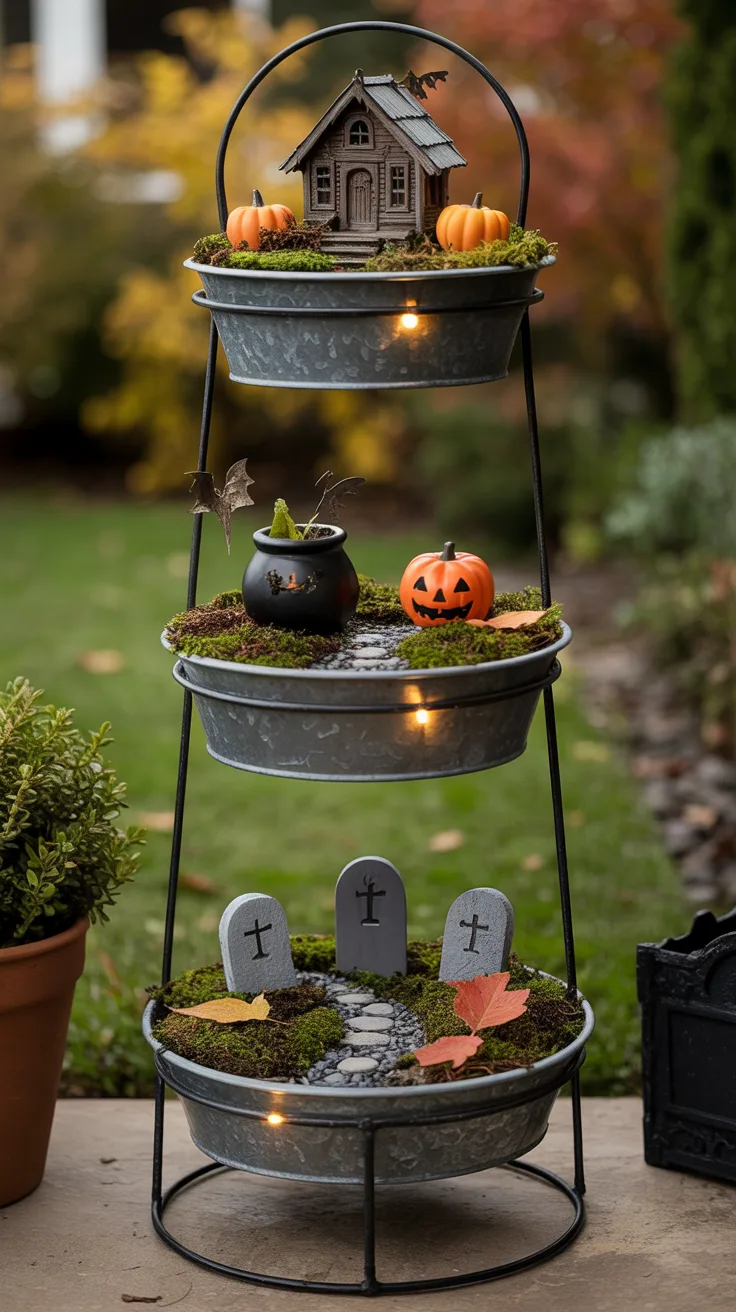
When floor space is extremely limited, vertical gardening is more practical than trying to make the individual containers tiny. A narrow three-tier stand can hold three normal-size small planters while using roughly the floor area of a single larger pot.
What You’ll Need
- Narrow three-tier plant stand
- Three 8- to 10-inch planters
- Compact plants
- Miniature tombstones
- Tiny pumpkins
- Small haunted house or fairy door
- Gravel
- Miniature lighting if desired
How to Create It
- Use one planter on each level rather than attempting to connect soil between the tiers.
- Create a tiny graveyard in the bottom planter.
- Make the middle planter a miniature pumpkin patch.
- Use the top planter for a small haunted house or witch scene.
- Repeat the same gravel and pumpkin style on all three levels.
- Add lighting sparingly to visually connect the separate gardens.
This approach provides significantly more usable planting and decorating area without requiring a wide patio or balcony.
8. 18-Inch Mini Wheelbarrow Halloween Garden
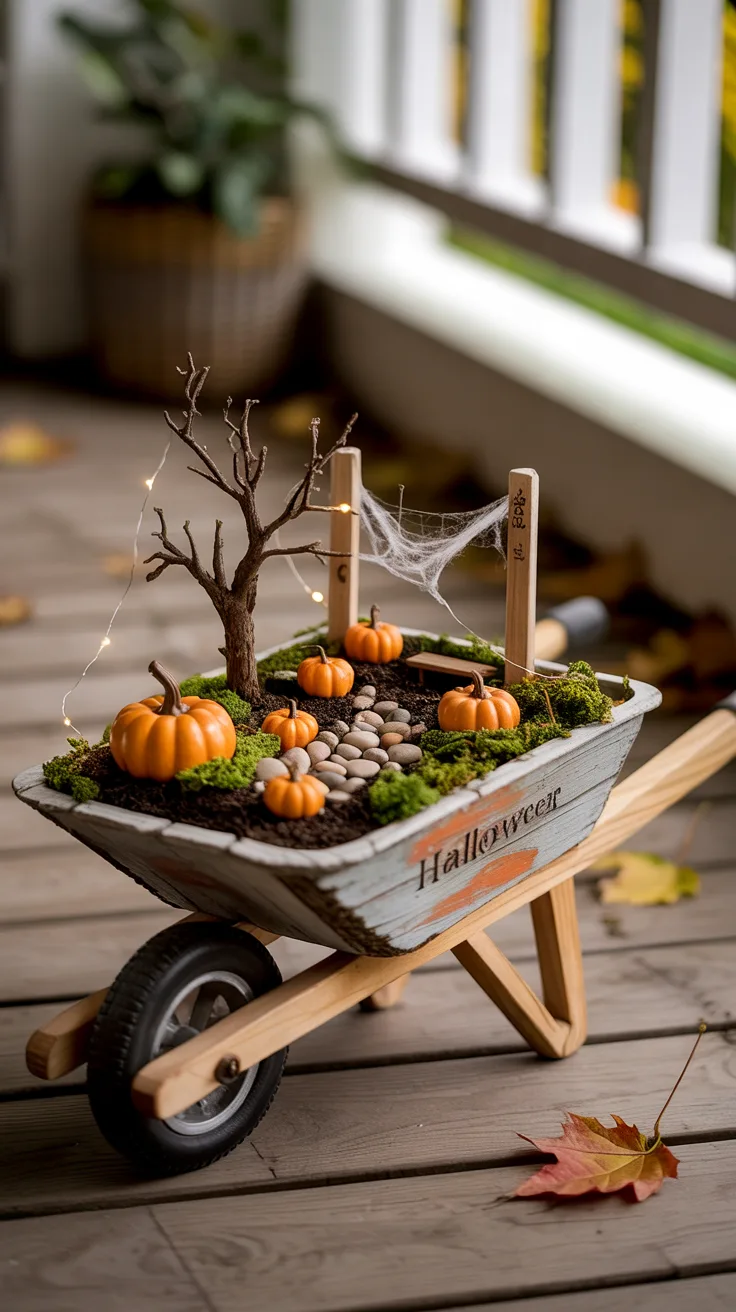
A small decorative wheelbarrow approximately 18 to 24 inches long can work well on a porch or patio where you have room for one substantial container but not a permanent garden bed.
What You’ll Need
- Small wheelbarrow-style planter
- Potting mix
- Two or three compact plants
- Small haunted house
- 3 to 5 tombstones
- Fine gravel
- Miniature pumpkins
- Twigs
- Small lantern
How to Create It
- Make sure the wheelbarrow can drain before filling it with potting mix.
- Place the plants toward the back and sides.
- Position one small haunted house toward the rear.
- Create a gravel path from the front of the container to the house.
- Place several tombstones together to create one cemetery area.
- Add bare twigs behind the cemetery.
- Cluster pumpkins near the house and pathway.
- Add a small lantern as the final focal detail.
Resist the temptation to add several buildings because one structure, one cemetery, and one pathway are enough to create a complete scene in a container this size.
Best Small-Space Containers for Fairy Gardens
If space is the main concern, choose a container based on usable planting surface rather than simply selecting the smallest vessel you can find.
- 10-12 inch flowerpot: Best for one simple scene
- 12-16 inch bowl planter: Best all-around choice for a tabletop fairy garden
- 24-inch window box: Best for narrow balconies and ledges
- Vertical plant stand: Best when floor space is limited
- 14-16 inch faux pumpkin: Best for a decorative seasonal project
- Small wheelbarrow planter: Best for a porch or patio corner
You can compare small shallow planters for fairy gardens if you need a container with more usable surface area than a standard flowerpot.
What About Teacups, Mugs, and Tiny Containers?
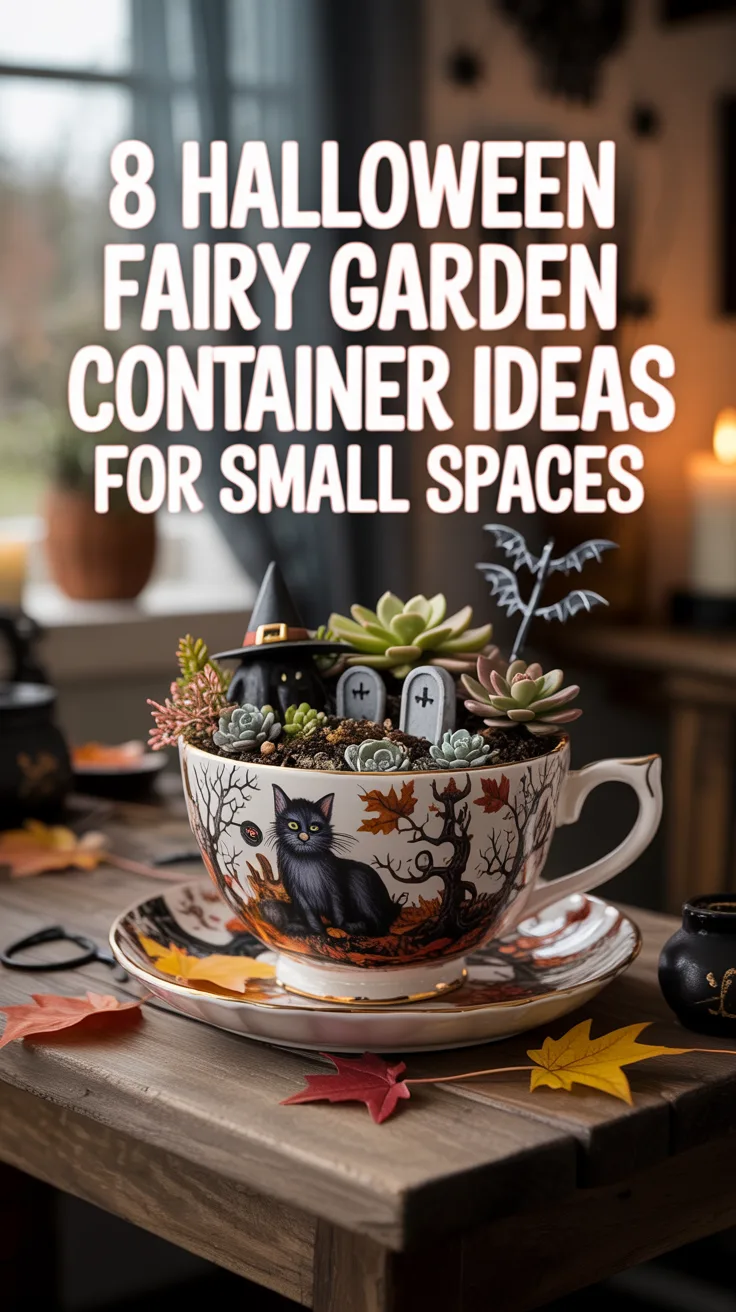
Teacups and mugs can certainly hold miniature plants and Halloween decorations, but it is more accurate to think of them as miniature Halloween planters or decorative vignettes rather than full fairy gardens.
An ordinary teacup has enough room for perhaps one very small plant and one or two tiny decorations. Once you add a house, path, fence, pumpkins, and other landscape elements, the proportions quickly become unrealistic.
If you like the teacup aesthetic, use an oversized decorative cup or bowl approximately 8 to 10 inches wide and keep the scene extremely simple.
Best Plants for Small Halloween Fairy Gardens
Plants should be selected according to the light, temperature, moisture, and container conditions where the garden will actually be kept. Mature size is particularly important because a plant that looks miniature at the nursery may quickly overwhelm a 12-inch container.
Compact succulents can work in containers that receive appropriate light and provide excellent drainage. Small ferns can create a woodland effect in conditions suited to ferns, while creeping plants can soften pathways and container edges when their growing requirements are met.
You can also skip living plants entirely. Artificial miniature plants and preserved decorative materials make sense for short-term Halloween displays, especially when the container will sit indoors or in a location unsuitable for living plants.
How to Make a Small Fairy Garden Look Bigger
Good scale is more important than the number of decorations you use. A small container can suggest a much larger miniature landscape when objects become progressively smaller toward the back.
- Use one focal structure instead of several buildings.
- Create a curved path rather than a straight line.
- Place larger accessories toward the front.
- Use smaller accessories toward the rear.
- Group similar objects instead of scattering them everywhere.
- Leave some visible gravel, soil, or moss between features.
- Use plants as the background rather than filling the entire container with foliage.
How to Add Lighting Without Taking Up Space
Fine-wire battery lights are useful in compact fairy gardens because the wire can be hidden behind plants, structures, or stones while the small bulbs remain visible.
Keep the battery pack outside wet planting areas and accessible so you can switch the lights on and replace batteries without dismantling the garden.
Tiny battery-operated mini fairy lights can illuminate a pathway or miniature haunted house without requiring much container space.
Common Small-Space Fairy Garden Mistakes
- Choosing a container that is too small to create an actual landscape
- Using a large miniature house in a 10-inch planter
- Adding too many accessories because each individual piece looks small
- Ignoring the mature size of living plants
- Using plants with incompatible growing requirements
- Choosing a deep narrow pot when a wide shallow container would provide more display area
- Mixing accessories made at noticeably different scales
- Covering every inch of soil with decorations
- Using indoor accessories outdoors without considering weather exposure
- Forgetting drainage when living plants are included
Frequently Asked Questions
What size container is best for a small fairy garden?
A container approximately 12 to 16 inches across is a practical range for many compact fairy gardens because it provides enough visible surface for plants, a focal feature, and a few miniature landscape details.
Can you really make a fairy garden in a teacup?
You can create a very small decorative miniature scene in a teacup, but a typical teacup provides little room for an actual landscaped fairy garden. A wider planter is more practical if you want plants, pathways, structures, and multiple accessories.
What is the best fairy garden for an apartment balcony?
A narrow window box, 12- to 16-inch bowl planter, or vertical arrangement of small containers can provide useful decorating space without occupying much balcony floor area.
What is the smallest practical fairy garden container?
There is no strict minimum, but around 10 to 12 inches across provides much more usable space for a simple scene than a mug or teacup. Smaller containers are better treated as miniature planters with one or two decorative elements.
Can I make a fairy garden without plants?
Yes. Artificial plants, preserved decorative moss, twigs, gravel, stones, and miniature accessories can create a seasonal Halloween display without the space and maintenance requirements of living plants.
How many accessories should I put in a small fairy garden?
Start with one focal feature and three to five supporting details. Add more only if there is still visible open space and each element remains easy to distinguish.
How do I make a small fairy garden inexpensive?
Use an existing flowerpot or planter and collect suitable natural materials such as small stones and fallen twigs. Spend your budget on one focal miniature and a few reusable Halloween accessories rather than purchasing every landscape element.
Can a small Halloween fairy garden stay outside?
It can stay outdoors when the container, plants, decorations, and lighting are suitable for the weather conditions in that location. Consider rainfall, wind, sunlight, drainage, and temperature when choosing materials.
Final Thoughts
For a genuinely usable small-space Halloween fairy garden, the goal should be a small container garden rather than the smallest possible container. A 12- to 16-inch planter can still fit comfortably on many balconies, porches, steps, and tables while providing enough room to make the miniature landscape believable.
Start with one focal idea such as a graveyard, haunted house, witch’s garden, or pumpkin patch. Add one or two appropriately sized plants, create a simple pathway, and use a handful of miniature details to complete the scene.
If your available space is extremely limited, consider going vertical or using a narrow window box before shrinking the individual garden down to teacup size. You will gain considerably more room for creating the miniature landscape while keeping the overall footprint small.