
Introduction: The Importance of Shed Organization
Let me tell you about the time I couldn’t find my pruning shears for an entire gardening season. They were buried somewhere in my chaotic garden shed, lost among piles of plant pots, bags of soil, and tangled hoses. That frustrating experience taught me that a disorganized shed isn’t just an eyesore—it’s a productivity killer.
If you’re anything like me, your garden shed has become a catch-all for tools, equipment, and seasonal items. Over time, this valuable space can transform from a helpful storage area into a cluttered nightmare. Implementing effective shed storage solutions isn’t just about tidiness; it’s about maximizing functionality, protecting your investments, and making your gardening experience more enjoyable.
I’ve spent years refining my approach to shed organization, and I’m excited to share 13 clever storage solutions that have transformed my garden shed from chaotic to efficient. These practical ideas will help you reclaim your space and ensure everything has its proper place.
1. Utilize Vertical Space with Wall Shelves

One of the biggest mistakes I made when first organizing my shed was ignoring the walls. Vertical space is prime real estate in any storage area, especially in smaller sheds.
Installing sturdy wall shelves immediately doubled my storage capacity. I prefer wooden shelves for heavier items and metal wire shelving for better visibility and air circulation. Make sure to secure shelves properly to wall studs for maximum weight support.
- Adjustable bracket systems allow for customization as your needs change
- Corner shelves utilize often-wasted space
- Floating shelves provide a cleaner look for more finished shed interiors
- Tiered shelving maximizes vertical space efficiency

View on AmazonAs an Amazon Associate, I earn from qualifying purchases.

View on AmazonAs an Amazon Associate, I earn from qualifying purchases.
Pro Tip: Install shelves at varying heights to accommodate different item sizes. Place frequently used items at eye level, heavier items on lower shelves, and seasonal items up high.
2. Install Pegboards for Tool Storage

Pegboards changed my shed organization game completely. After years of digging through toolboxes and drawers, I installed a large pegboard that turned my tool collection into an accessible wall display.
The beauty of pegboards lies in their versatility. With an assortment of hooks, holders, and accessories, you can create a custom storage system for virtually any tool. I trace outlines around each tool, making it immediately obvious where everything belongs—and what’s missing when I’m working on a project.

View on AmazonAs an Amazon Associate, I earn from qualifying purchases.

View on AmazonAs an Amazon Associate, I earn from qualifying purchases.
Pro Tip: Group similar tools together on your pegboard and arrange them according to frequency of use. This creates an intuitive system that saves time and reduces frustration when you’re in the middle of a project.
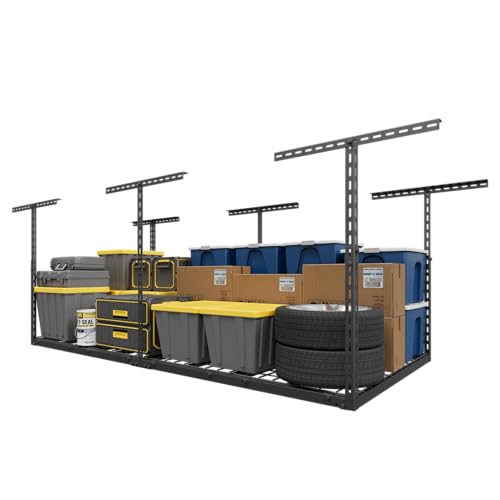
3. Use Overhead Storage Racks

Looking up changed my perspective on shed storage solutions. The ceiling offers valuable space that’s perfect for items you don’t need to access regularly.
I installed overhead racks that hang from the ceiling joists to store holiday decorations, camping gear, and out-of-season equipment. This approach freed up considerable floor and wall space for items I use more frequently.
When selecting overhead storage, consider the weight capacity of both the racks and your shed’s structure. Safety should always be your priority—I learned this the hard way after an overloaded rack came crashing down (thankfully missing my vintage garden gnome collection).

View on AmazonAs an Amazon Associate, I earn from qualifying purchases.
View on AmazonAs an Amazon Associate, I earn from qualifying purchases.
4. Repurpose Old Cabinets and Drawers

Some of my most effective storage solutions came from items destined for the landfill. Old kitchen cabinets, dressers, and bathroom vanities can find new life in your garden shed.
I repurposed an old kitchen cabinet unit, adding a fresh coat of exterior paint and some waterproof sealant. It now houses all my potting supplies, seed packets, and smaller garden tools. The drawers are perfect for organizing items that would otherwise get lost in larger containers.
The closed storage these pieces provide also protects contents from dust, spiders, and moisture—something I particularly appreciate for items like seeds and bulbs that need to stay dry.
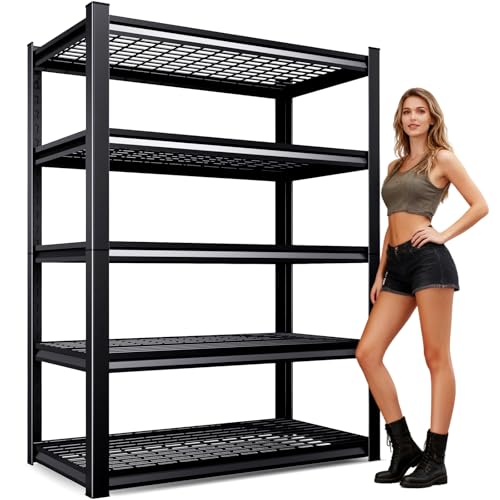
5. Incorporate Adjustable Shelving Units

Garden needs change with the seasons, and your storage should adapt accordingly. Adjustable shelving units offer the flexibility to reconfigure your space as needed.
I installed track-based shelving that allows me to change shelf heights without tools. This system has been invaluable as my gardening interests have evolved from container gardening to more extensive vegetable growing, requiring different types of supplies and tools.

View on AmazonAs an Amazon Associate, I earn from qualifying purchases.
View on AmazonAs an Amazon Associate, I earn from qualifying purchases.
Pro Tip: Reassess your shelving configuration at the beginning of each season. Adjust heights and positions to accommodate seasonal tools and supplies that will be in frequent rotation.
6. Opt for Stackable Storage Bins

Clear, stackable bins revolutionized my small-item storage. They’re particularly useful for categorizing and protecting items that would otherwise create clutter.
I use a color-coded system: green bins for gardening supplies, blue for pond maintenance, red for power tool accessories, and yellow for household overflow storage. Each bin gets a detailed label listing contents, which saves me countless hours of searching.
- Seeds and bulbs
- Garden gloves and small hand tools
- Plant markers and tags
- Irrigation parts and fittings
- Fertilizers and soil amendments (in sealed containers)
7. Implement a Hook System for Bulky Items

Large, awkwardly shaped items like rakes, shovels, and hoses can quickly consume valuable floor space. A robust hook system keeps these items accessible while maximizing space efficiency.
I installed heavy-duty utility hooks at various heights along one wall of my shed. The higher hooks hold long-handled tools, while lower hooks accommodate coiled hoses, extension cords, and smaller items like hand trowels and pruners.
For items that tend to fall off standard hooks (I’m looking at you, garden hose), I use specialized holders designed for specific purposes. My leaf rake no longer slides off its hook and crashes onto my head when I’m reaching for the shovel!
8. Designate Zones for Different Items

Organization becomes intuitive when you create dedicated zones within your shed. This approach transformed how I interact with my space—everything has a logical home based on use and function.
My shed now has distinct areas for hand tools, power equipment, potting supplies, and seasonal decorations. Each zone is clearly defined, sometimes with simple colored tape on shelves or walls to provide visual cues.
This zoning system is particularly helpful when I’m in a hurry or when my spouse or children need to find or return items. Everyone knows exactly where things belong, which helps maintain organization long-term.
9. Use Clear Containers for Smaller Items

Small items like seed packets, plant labels, and irrigation fittings can quickly become a jumbled mess. Clear containers solve this problem by keeping items visible yet contained.
I repurposed clear food containers, mason jars, and specialized craft organizers to create a system for my smallest garden supplies. Being able to see contents at a glance saves valuable time and prevents duplicate purchases.
Pro Tip: Group similar small items together in categorized containers. For example, keep all plant markers in one container, seed packets in another, and irrigation fittings in a third. This creates a modular system that’s easy to maintain.
10. Create a Fold-Down Workbench

A dedicated workspace inside your shed can transform it from mere storage to a functional garden headquarters. However, permanent workbenches consume valuable floor space.
My solution was a wall-mounted fold-down workbench that provides a sturdy surface when needed but tucks away when not in use. I built mine from scrap plywood and heavy-duty hinges, with fold-out legs for additional support when extended.
This workspace has become command central for seed starting, small repairs, and tool maintenance—activities that previously cluttered my kitchen table, much to my family’s dismay.
11. Add Magnetic Strips for Metal Tools

Small metal tools can be among the most challenging items to keep organized. They’re often too small for hooks but too important to bury in bins.
I mounted several magnetic tool strips (similar to knife strips used in kitchens) at eye level near my workbench. These hold pruners, scissors, trowels, and other metal tools in plain sight, making them easy to grab and return.
This system has been particularly effective for items I use frequently during active gardening seasons. No more digging through drawers with dirty hands looking for my favorite pruners!
12. Employ a Rolling Cart for Flexibility

Some shed storage solutions need to be mobile. A rolling utility cart provides organized storage that moves where you need it.
My multi-tiered cart holds frequently used supplies and follows me around the garden. The top tier contains current project materials, while lower tiers hold essentials like gloves, twine, and hand tools.
When not in use, the cart tucks neatly into a corner of my shed, taking up minimal space while keeping essentials accessible and organized.
13. Consider a Loft for Seasonal Items

If your shed has a pitched roof, you’re sitting on untapped storage potential. A simple loft area can dramatically increase your storage capacity.
I built a basic loft platform in the upper portion of my shed using 2x4s and plywood. This area now houses holiday decorations, rarely used equipment, and off-season items. Access is via a wall-mounted ladder that hooks over the loft edge when needed but stores flat against the wall when not in use.
This solution effectively doubled my storage space by utilizing an area that would otherwise remain empty.
Conclusion: Transform Your Shed into a Storage Haven
Implementing these shed storage solutions has transformed my gardening experience from frustrating to enjoyable. No more wasted time searching for tools, no more damaged equipment from improper storage, and no more dread when I need to find something quickly.
The key to success lies in choosing solutions that match your specific needs and available space. Start with one or two ideas that address your most pressing storage challenges, then gradually implement others as time and budget allow.
Remember that shed organization isn’t a one-time project but an evolving system. As your gardening interests change and seasons shift, be willing to reassess and adjust your storage strategies accordingly.
With thoughtful planning and these practical solutions, your garden shed can become more than just a storage space—it can be the organized hub that makes your outdoor projects more efficient and enjoyable.
Frequently Asked Questions
What materials are best for shed shelves?
For shed shelving, pressure-treated lumber, marine-grade plywood, or metal shelving units offer the best durability in potentially damp conditions. If using untreated wood, apply a waterproof sealant to protect against moisture. Wire shelving provides good air circulation, which helps prevent mildew in humid environments.
How can I prevent moisture damage in my shed storage?
To protect items from moisture damage, elevate storage off the floor using pallets or shelving. Install a small dehumidifier or use moisture-absorbing products like DampRid. Ensure proper ventilation with vents or a small fan, and consider adding a moisture barrier under containers storing sensitive items. Regularly check for leaks in the roof or walls and repair promptly.
Are there any safety tips for storing tools in a garden shed?
Always store sharp tools with blades covered or pointed downward. Place heavy items on lower shelves to prevent tipping hazards. Keep chemicals in their original containers, clearly labeled, and away from children’s reach. Ensure power tools are unplugged and batteries are removed for long-term storage. Create clear pathways to prevent tripping, and install adequate lighting so you can see potential hazards.
How often should I reorganize my garden shed?
A seasonal reorganization (four times yearly) works best for most gardeners. This allows you to rotate seasonal equipment to accessible locations and move off-season items to less prime storage areas. However, a quick monthly tidy-up prevents small disorganization from becoming overwhelming. At minimum, do a thorough cleanout and reorganization annually, ideally at the end of the growing season.
What are some budget-friendly storage solutions for a shed?
Repurpose household items like coffee cans for small tool storage or plastic food containers for seeds and small parts. Use PVC pipes cut lengthwise and mounted to walls to create channels for long-handled tools. Repurpose old furniture like dressers or cabinets for closed storage. Pallet wood can be transformed into wall organizers or shelving at minimal cost. Even simple solutions like installing cup hooks under shelves can maximize storage without breaking the budget.