Introduction: Setting Up for Success
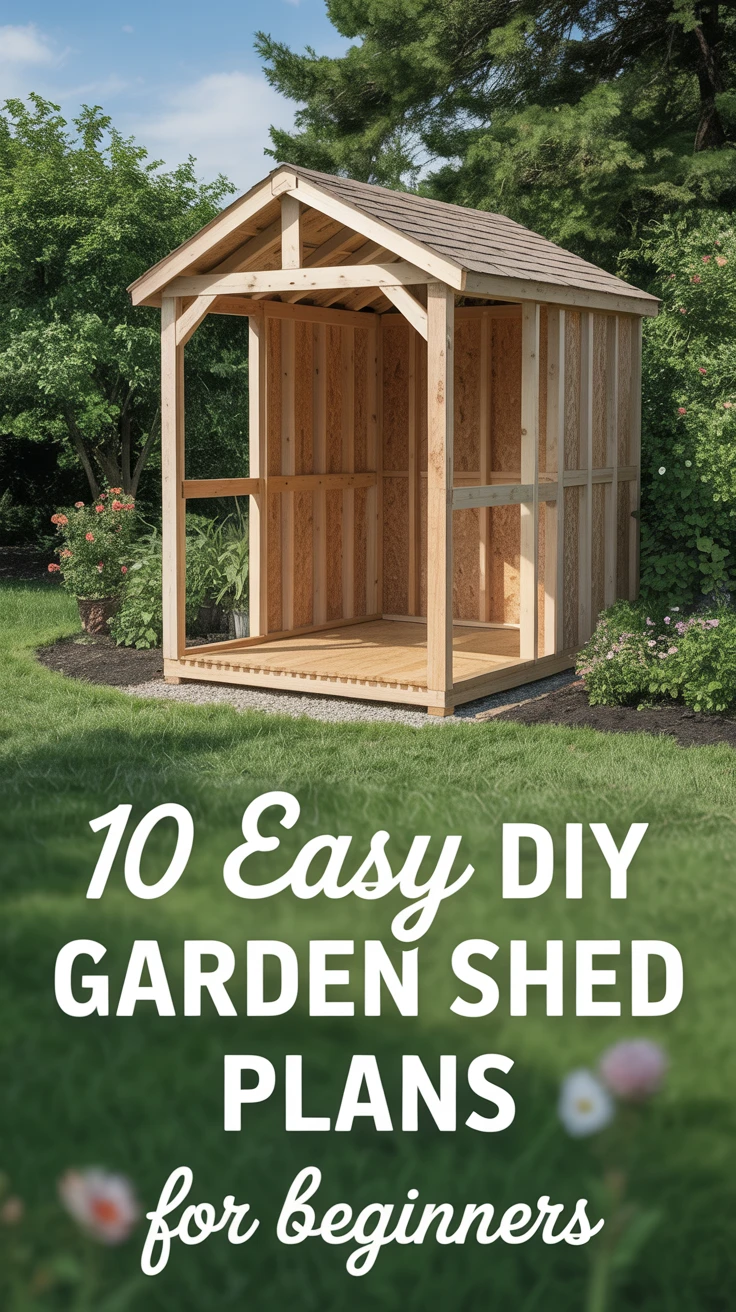
When I first decided to build a garden shed, I was overwhelmed by complex plans that seemed to require a master carpenter’s skills. That’s why I’ve created this guide specifically for beginners like I once was. Building your own DIY garden shed offers numerous benefits that extend beyond just saving money:
- Customization to fit your exact needs and space
- Satisfaction of creating something with your own hands
- Lower costs compared to pre-built options
- Ability to match your home’s aesthetic
- Opportunity to learn valuable building skills
Each of these shed plans is designed with simplicity in mind, using readily available materials and basic tools. I’ve made plenty of mistakes along the way so you don’t have to! Let’s dive into these beginner-friendly projects that will enhance your outdoor space.
1. Basic Tool Shed: A Beginner’s Starting Point
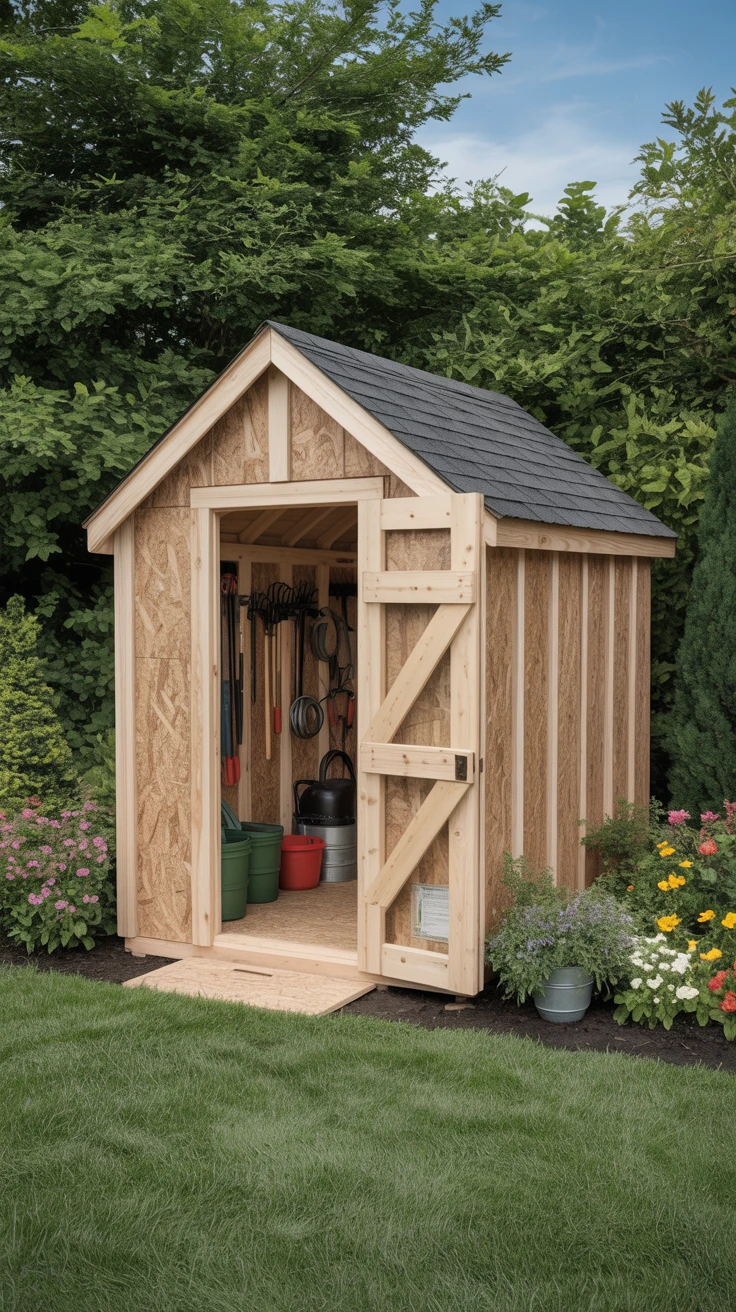
My first DIY garden shed was this basic 6×8 tool shed, and it remains my go-to recommendation for beginners. It provides ample storage while being straightforward to construct.
For this project, you’ll need:
- Pressure-treated 2×4 lumber for framing
- Plywood for flooring and walls
- Asphalt shingles for roofing
- One pre-hung door
- Basic hardware (nails, screws, hinges)
Construction steps:
- Build a simple rectangular base frame with 2×4s
- Add floor joists every 16 inches
- Attach plywood flooring
- Construct wall frames on the ground, then raise into position
- Install roof trusses and plywood sheathing
- Add roofing material and door

View on AmazonAs an Amazon Associate, I earn from qualifying purchases.

View on AmazonAs an Amazon Associate, I earn from qualifying purchases.
Pro Tip: Always build your shed on level ground with a gravel base for drainage. I once skipped this step and ended up with a tilting shed after the first heavy rain!
2. Modern Mini Shed: Sleek and Simple
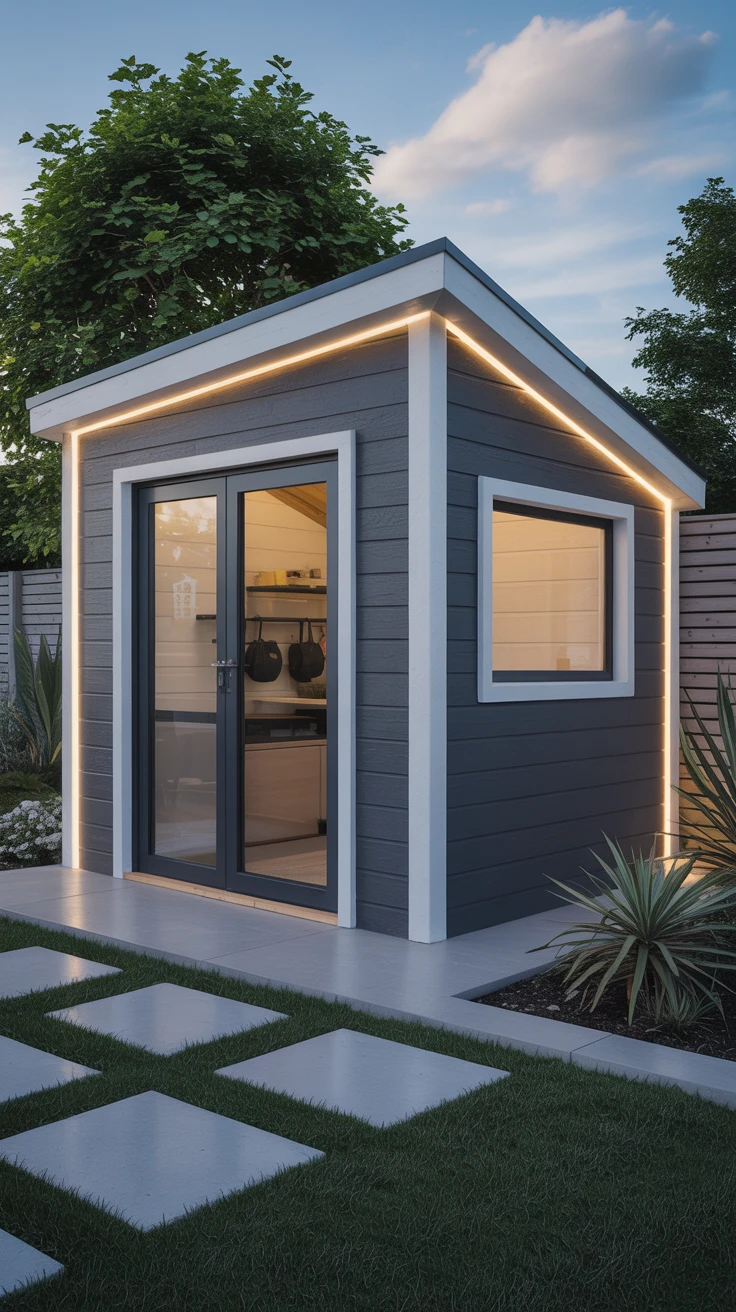
This 4×6 modern-style shed is perfect for smaller yards. Its clean lines and minimalist design make it an attractive addition to contemporary landscapes.
Key design elements include:
- Single-slope “shed style” roof for modern appeal and easy construction
- Large door opening for easy access
- Optional window on one side
- Smooth exterior siding (fiber cement boards work well)
- Contemporary paint colors (I used charcoal with white trim)
What makes this shed beginner-friendly is its simple box structure and minimal cutting requirements. The single-slope roof eliminates the complexity of traditional peaked roofs.

View on AmazonAs an Amazon Associate, I earn from qualifying purchases.

View on AmazonAs an Amazon Associate, I earn from qualifying purchases.
Pro Tip: For a truly modern look, install solar-powered LED lighting along the roofline. It adds functionality while enhancing the contemporary aesthetic.
3. Rustic Wooden Shed: Embrace the Natural Look
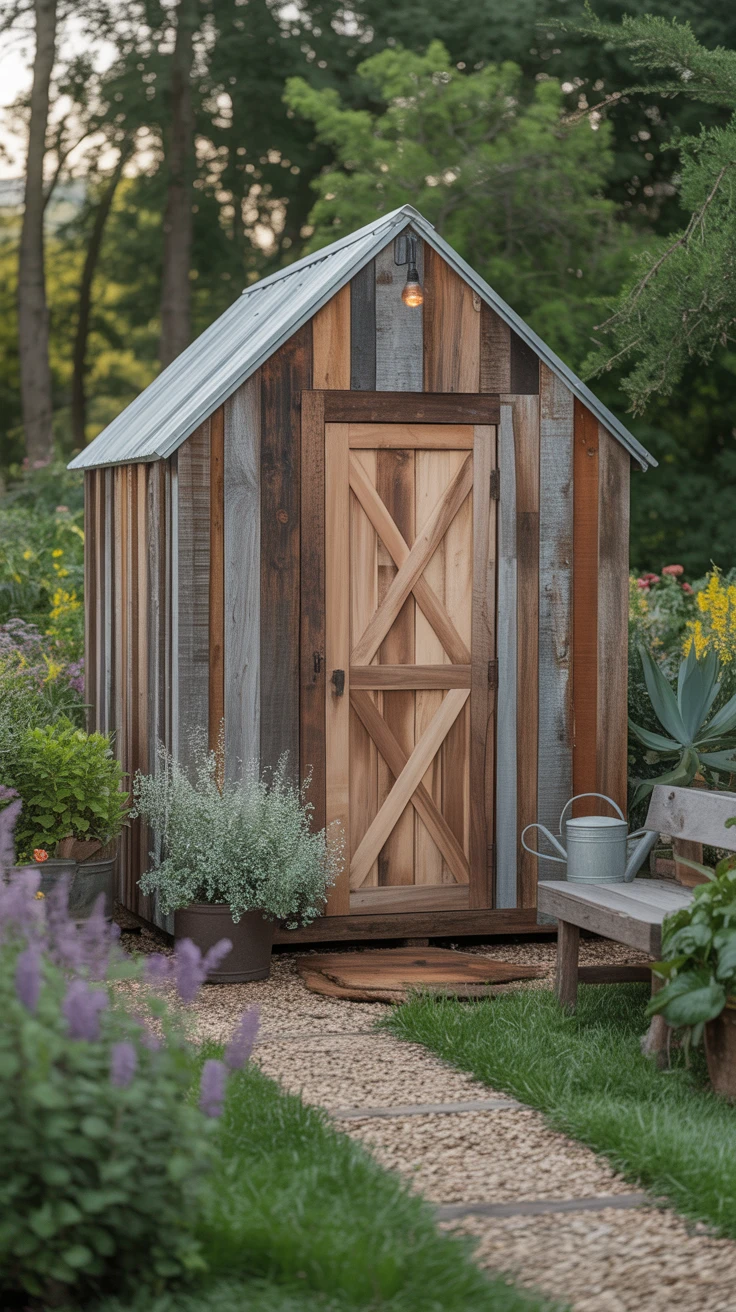
This 8×8 rustic shed became my weekend retreat after I built it using reclaimed barn wood. The natural, weathered appearance adds character to any garden.
Wood considerations:
- Cedar or cypress for natural rot resistance
- Reclaimed barn wood for authentic rustic appeal
- Pine treated with natural oils for an economical option
Pros and cons of the rustic shed:
- Pros: Unique character, environmentally friendly if using reclaimed wood, naturally blends with garden settings
- Cons: Requires more maintenance, wood selection can be time-consuming, may need more weather protection
Pro Tip: Apply a mix of vinegar and steel wool (left to sit for a week) to new wood for an instant aged appearance. I used this technique on my door trim, and visitors always ask about my “antique” shed!
4. Storage Lean-To: Efficiency at Its Best
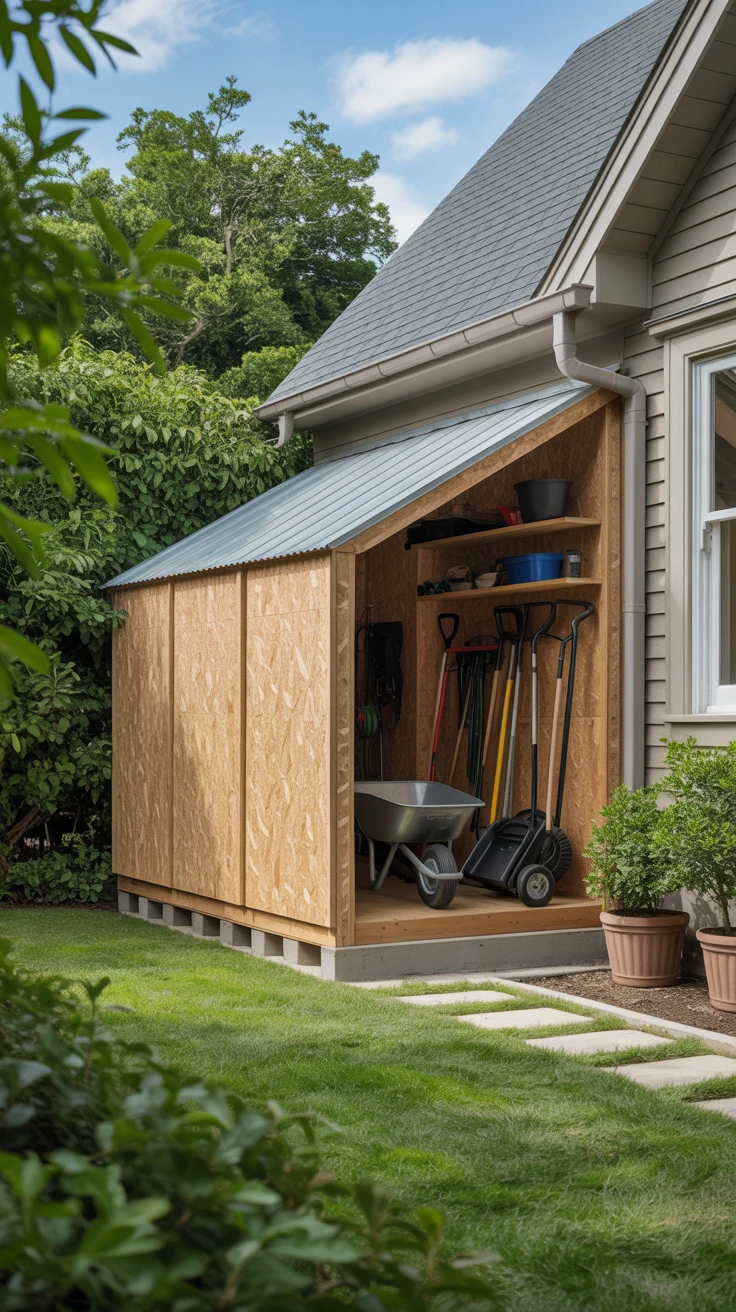
When I ran out of space in my garage but had limited yard space, this lean-to shed saved the day. Attached to an existing structure, it requires only three walls and is perfect for storing garden tools, wheelbarrows, and lawnmowers.
Materials needed:
- 2×4 lumber for framing
- Exterior grade plywood for walls
- Roofing material to match the main structure
- Flashing to seal the connection to the existing wall
- Concrete blocks or gravel for foundation
The key to a successful lean-to is proper attachment to the existing structure and ensuring water runs off the roof correctly. I learned this the hard way during my first attempt!
Pro Tip: Install a clear polycarbonate panel in part of the roof to allow natural light in without the complexity of adding windows.
5. Potting Shed: Gardeners’ Delight
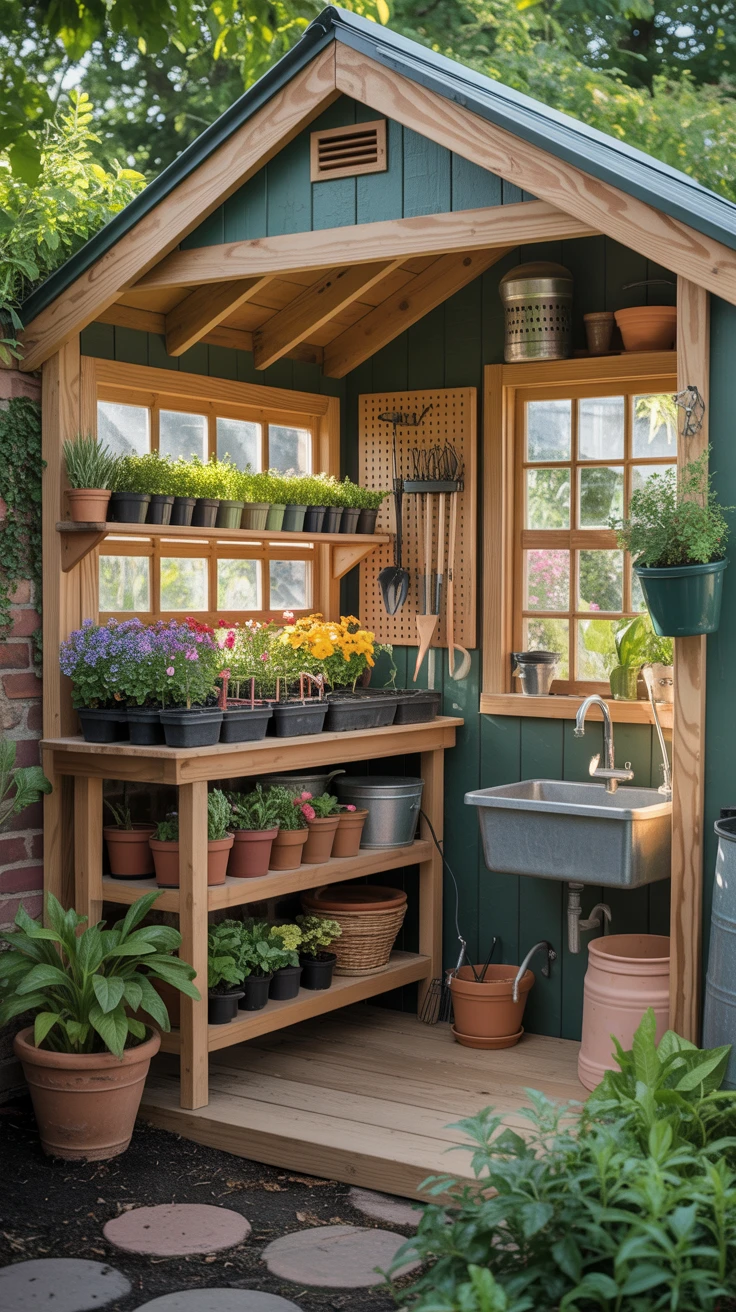
This 8×10 potting shed combines storage with a functional workspace for all your gardening activities. It’s where I start seedlings, repot plants, and store all my gardening supplies.
Essential features to include:
- Potting bench at a comfortable working height (36″ worked best for me)
- South-facing windows for maximum light
- Wall storage for tools using pegboard or shelving
- Sink with simple drainage if water access is available
- Storage bins underneath the potting bench
The beauty of this DIY garden shed is that it serves multiple purposes while keeping everything organized. I added extra shelving for storing pots and seed trays.
Pro Tip: Install a rain barrel system connected to your shed’s gutter to collect water for your plants. It’s eco-friendly and reduces water bills!
6. Compact Corner Shed: Making the Most of Your Space

The five-sided corner shed I built utilizes an often overlooked area of the garden. With its pentagonal design, it fits snugly into a corner while providing surprising amounts of storage.
Space-saving design considerations:
- Pentagon shape to fit corner spaces
- Vertical storage solutions inside (wall hooks, shelving)
- Single door positioned at the front angle
- Roof design that channels water away from the corner
While the angled cuts might seem intimidating, I found that careful measuring and marking made this project manageable even as a beginner.
Pro Tip: Create a full-size template of the floor plan using string or garden hose before building to ensure the shed fits perfectly in your corner space.
7. Firewood Storage Shed: Keep Your Wood Dry
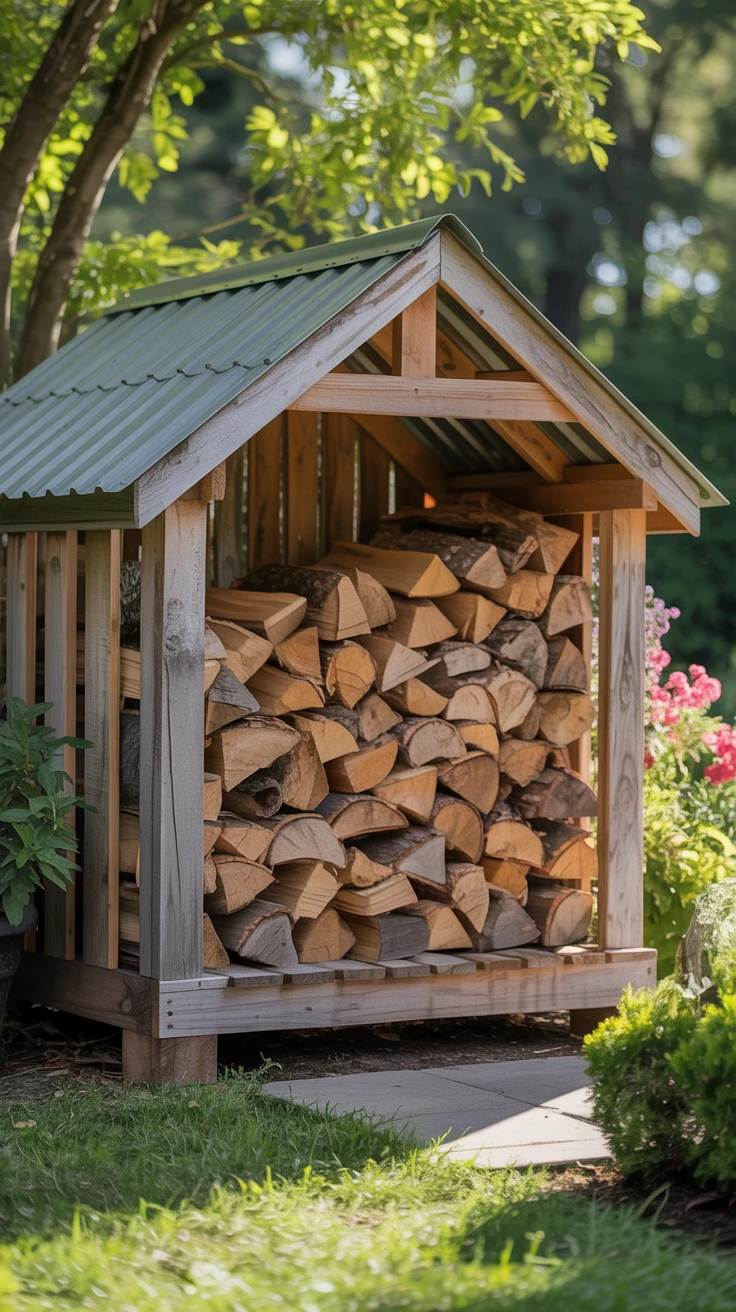
After getting tired of soggy firewood, I built this open-sided shed specifically designed for storing and seasoning firewood. It keeps wood dry while allowing airflow for proper seasoning.
Key weatherproofing considerations:
- Raised floor to prevent ground moisture absorption
- Sloped roof with sufficient overhang
- Open sides for maximum air circulation
- South-facing orientation to catch sunlight
This simple structure consists primarily of a roof supported by posts, with optional back and side panels depending on your local weather conditions.
Pro Tip: Stack firewood bark-side up in your storage shed. The bark naturally sheds water, keeping the split sides drier.
8. Playhouse Shed: Double the Fun
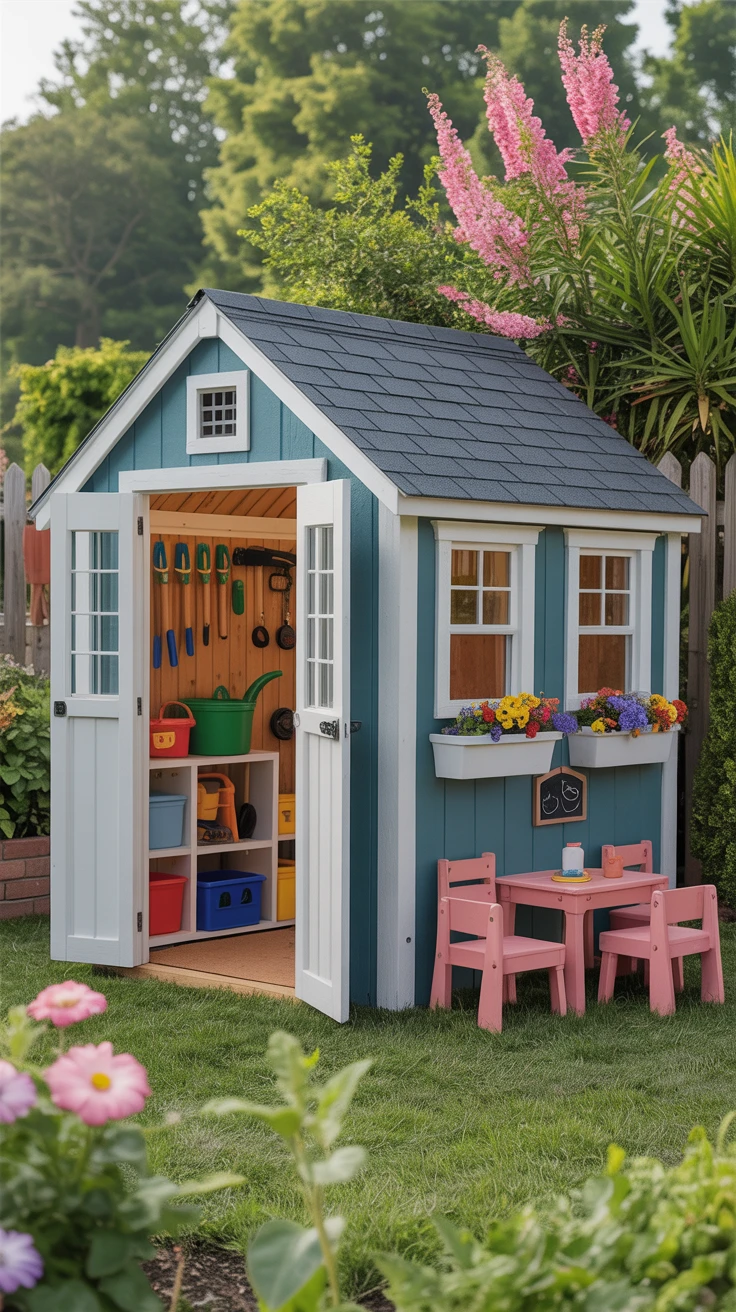
This dual-purpose 8×8 shed became an instant hit with both the kids and adults in my family. One half serves as storage for garden equipment, while the other half is a delightful playhouse.
Safety and design considerations:
- Rounded edges on all exposed corners
- Non-toxic paint and materials
- Secure divider between storage and play areas
- Child-safe windows (plexiglass is ideal)
- Proper ventilation for both sections
The playhouse section can include fun elements like a small porch, window boxes for children’s plants, and child-sized furniture.
Pro Tip: Install a chalkboard wall inside the playhouse section. It provides endless entertainment and can be used to teach children about plants and gardening.
9. Greenhouse Shed: For the Green Thumbs
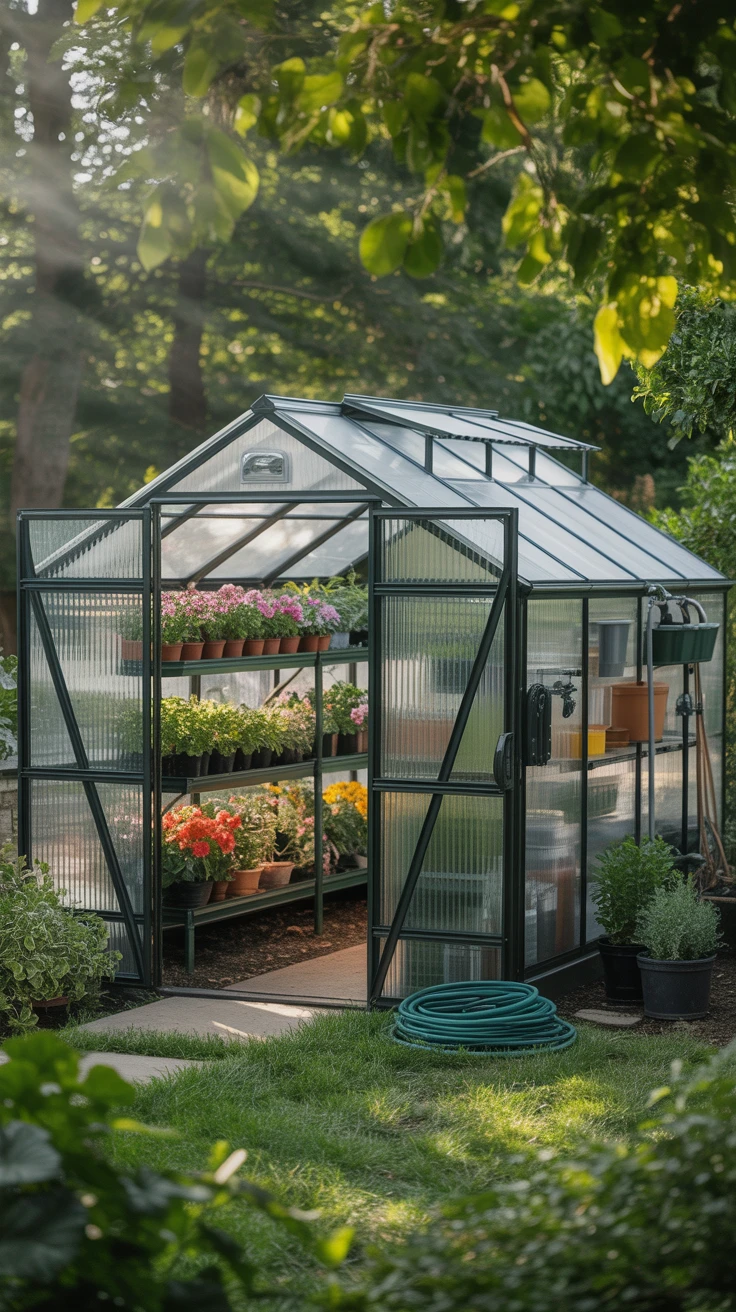
Combining storage with growing space, this 10×12 greenhouse shed has transformed my gardening capabilities. One section is a traditional shed, while the other features transparent panels for plant growing.
Important considerations:
- Proper orientation for maximum sunlight (south-facing is best)
- Ventilation options including roof vents and windows
- Heat-resistant storage area for tools and supplies
- Shelving arranged to maximize growing space
- Irrigation system for consistent watering
I use polycarbonate panels for the greenhouse section as they’re lighter and more durable than glass, making them easier for beginners to work with.
Pro Tip: Install automatic vent openers that use heat-sensitive hydraulics to open and close vents without electricity. They’ve saved my seedlings on hot days when I wasn’t home!
10. Bike Storage Shed: Secure Your Ride
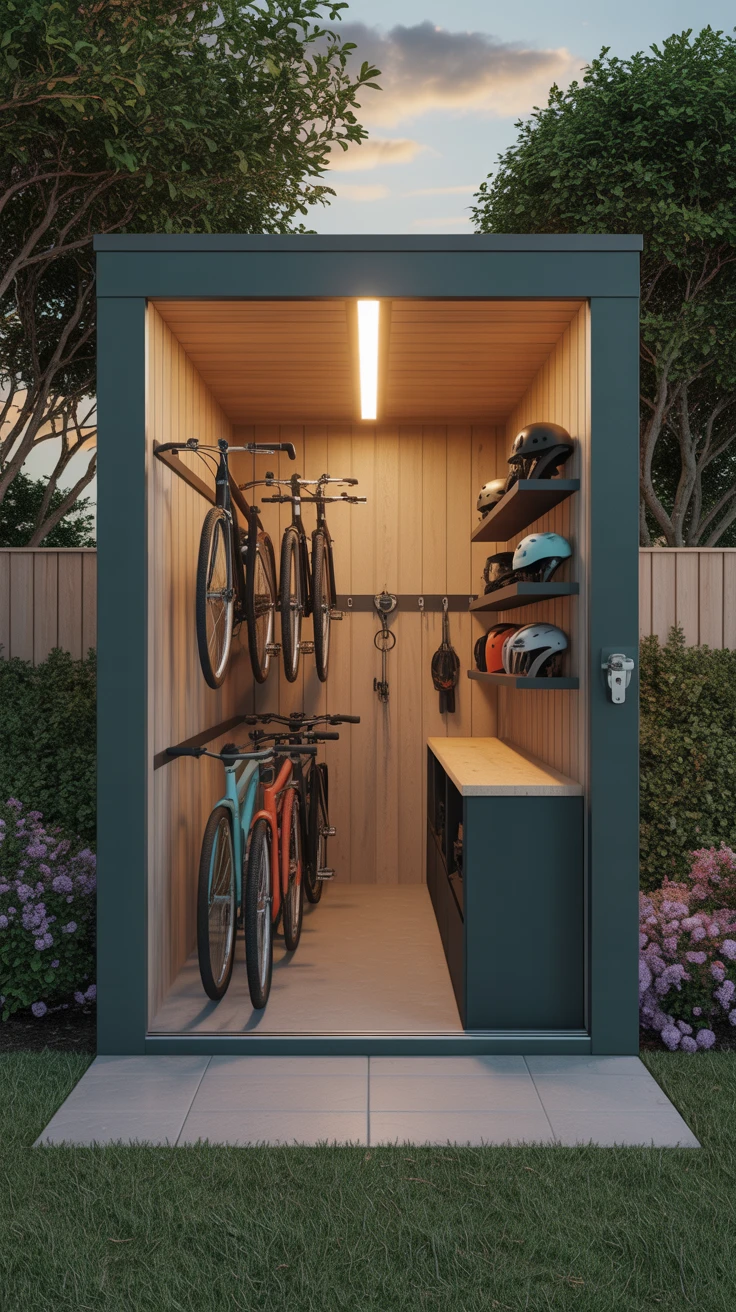
Our family’s bicycles were cluttering the garage until I built this specialized 4×8 bike storage shed. It keeps bikes secure, accessible, and protected from the elements.
Security and layout features:
- Heavy-duty door with quality padlock system
- Wall-mounted bike hooks for vertical storage
- Small workbench for basic repairs
- Storage for helmets, pumps, and other accessories
- Sloped entry ramp for easy access
The narrow, rectangular design maximizes bike storage while minimizing the footprint in your yard.
Pro Tip: Install a pulley system for hanging bikes from the ceiling to maximize floor space. This works especially well for children’s bikes that aren’t used daily.
Pro Tips for Building DIY Garden Sheds
Through years of building various DIY garden sheds, I’ve collected these essential tips that will save you time, money, and frustration:
- Always check local building codes and obtain necessary permits before starting
- Create a detailed materials list and add 10% extra for inevitable waste
- Use a level constantly throughout the building process
- Pre-drill holes to prevent wood splitting
- Apply preservative to cut ends of pressure-treated lumber
- Build wall frames on the ground and raise them into position
- Consider wind direction when positioning doors to prevent damage
- Use hurricane ties in windy areas for roof security
- Invest in quality exterior paint or stain for longevity
Pro Tip: Take photos throughout your build process. They’re not just great mementos but also helpful references when you need to make repairs or modifications years later.
Frequently Asked Questions
What is the most cost-effective shed to build?
The lean-to shed is typically the most cost-effective option as it requires fewer materials (only three walls) and can utilize an existing structure for support. The firewood storage shed is also economical as it has an open design with minimal materials.
How long does it take to build a garden shed?
For beginners, most of these shed plans require 2-4 weekends to complete. The basic tool shed and lean-to designs can often be completed in 2-3 days, while more complex designs like the greenhouse shed might take 4-6 days of work. Working with a helper can significantly reduce these timeframes.
What tools are essential for building a shed?
Essential tools include: hammer, tape measure, level, square, circular saw, drill/driver, ladder, and safety equipment (gloves, goggles). While additional tools like miter saws and nail guns are helpful, they’re not necessary for beginners.
Can I use a shed kit instead of building from scratch?
Yes, shed kits are an excellent alternative for beginners. They provide pre-cut materials and detailed instructions, reducing the chance of errors. However, they offer less customization and typically cost more than building from scratch. I recommend starting with a simple DIY project first to learn the basics before investing in an expensive kit.
How do I maintain my garden shed?
Regular maintenance includes: checking for roof leaks annually, reapplying paint or stain every 2-3 years, keeping gutters clear, lubricating door hinges, checking for pest infestations, and ensuring proper ventilation to prevent moisture buildup. I set a calendar reminder each spring to inspect my sheds and address any issues before they become major problems.