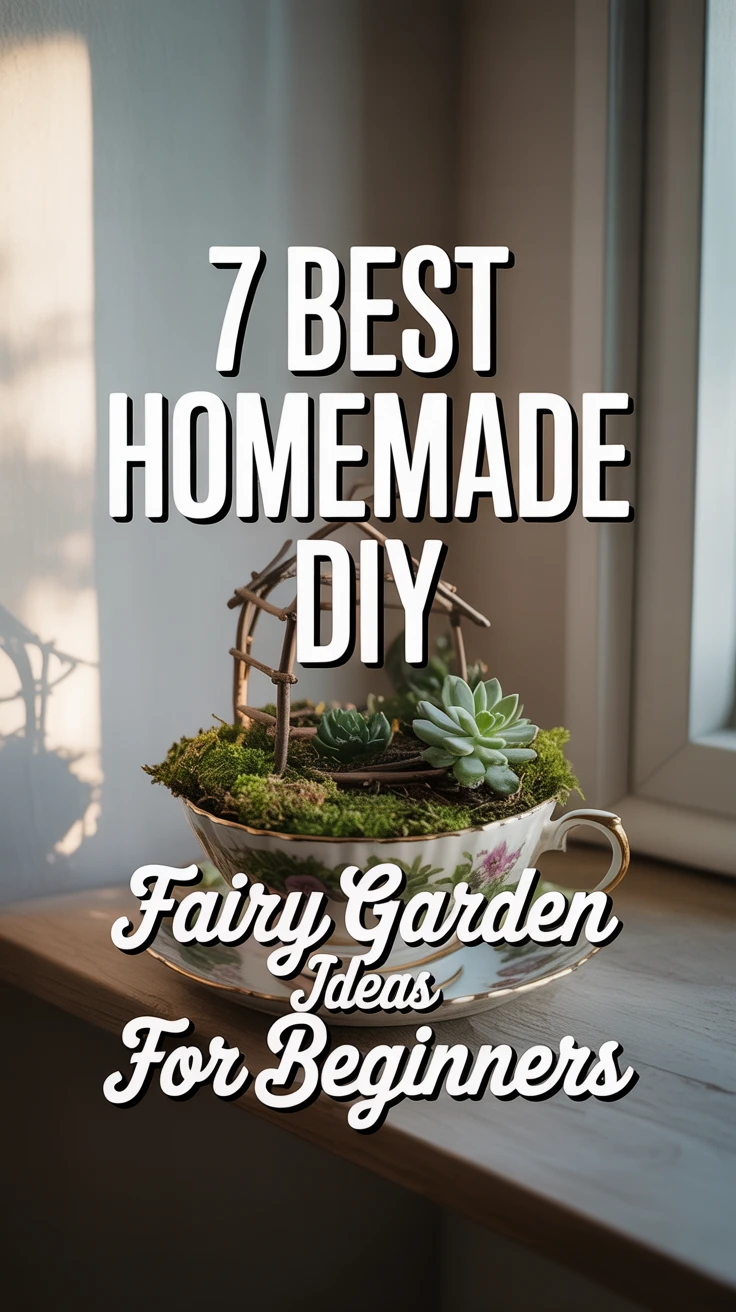

Welcome to the World of Fairy Gardens
There’s something magical about creating a miniature world where fairies might dwell. As someone who’s spent countless hours crafting these enchanting spaces, I can tell you that DIY fairy garden ideas aren’t just for experienced crafters—they’re perfect for beginners too! When I created my first fairy garden, I was amazed at how a simple container, a few plants, and some tiny decorations could transform into something so charming.
The beauty of homemade DIY fairy gardens is that they don’t require expensive materials or specialized skills. In fact, some of my most beloved fairy gardens started with items I already had around the house. Whether you’re looking to create an outdoor fairy garden nestled among your landscaping or a miniature indoor garden on your windowsill, these seven ideas will help you get started on your magical journey.
1. Choose the Perfect Miniature Plants
The foundation of any fairy garden is its greenery. When I first started, I made the mistake of choosing plants that quickly outgrew my tiny landscape! Now I know better—selecting the right plants makes all the difference.
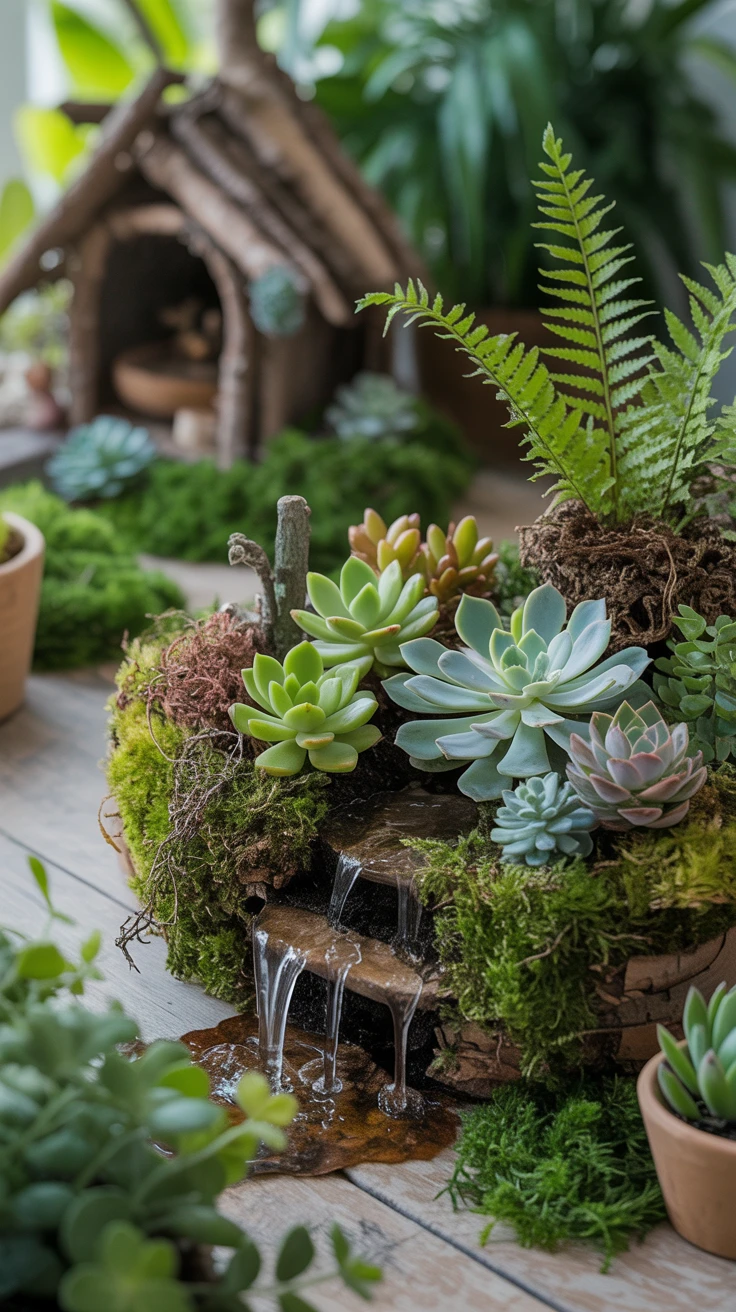
- Succulents – These low-maintenance plants come in various shapes and sizes, perfect for mimicking miniature trees or creating unique garden features
- Moss – Creates instant “carpeting” and adds a lush, established feel to your fairy garden
- Irish Moss – Forms a perfect fairy lawn with its dense, carpet-like growth
- Baby’s Tears – Creates a cascading effect, ideal for fairy waterfalls or hanging gardens
- Miniature Ferns – Adds woodland charm and delicate texture
Pro Tip: When selecting plants, consider their growth rates and water needs. I once combined a drought-loving succulent with moisture-loving moss, creating a maintenance nightmare! Choose plants with similar care requirements to ensure your fairy garden thrives.
2. Think Outside the Pot – Creative Containers
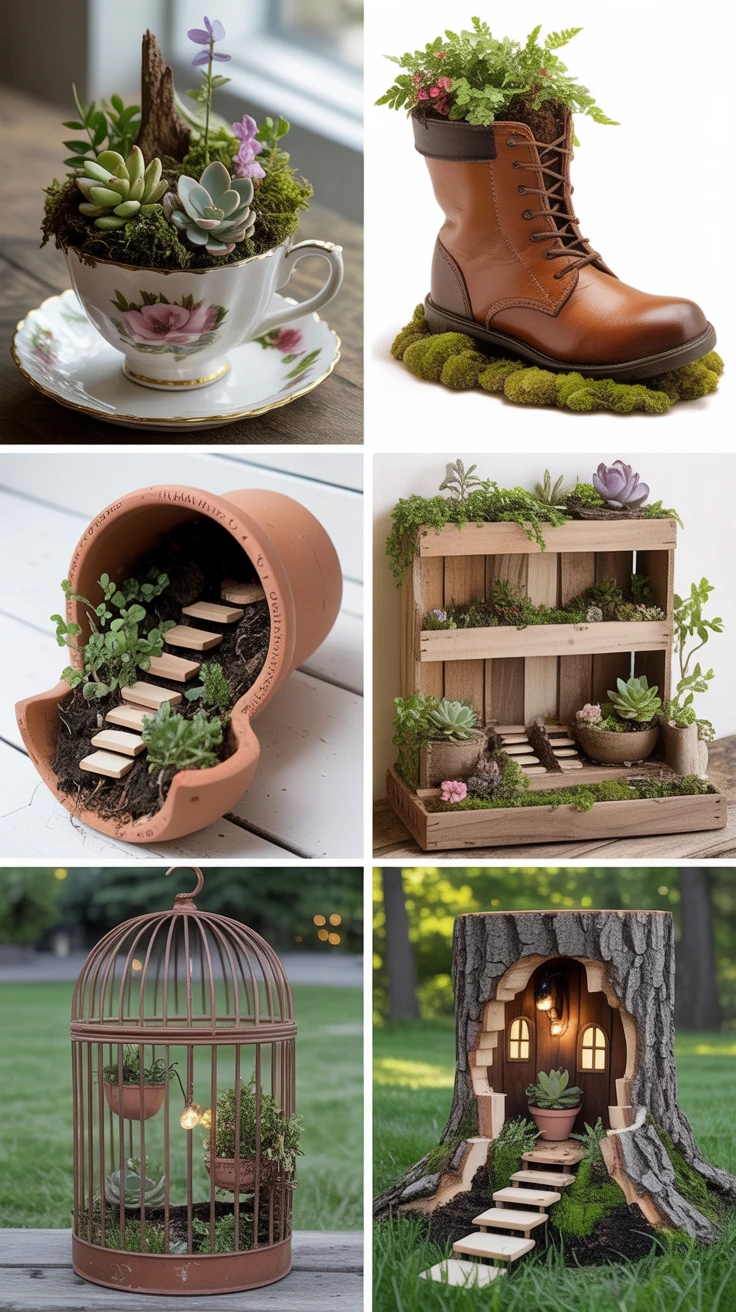
One of my favorite aspects of homemade DIY fairy garden ideas is the endless creativity with containers. Your container sets the stage for your miniature world, and I’ve found that repurposed items often make the most charming homes for fairies.
- Teacups and teapots – Perfect for dainty indoor fairy gardens
- Old boots or shoes – Creates whimsical, unexpected fairy homes
- Wooden crates – Offers depth and multiple levels for complex designs
- Broken terracotta pots – Can be arranged to create multi-tiered gardens with built-in fairy caves
- Vintage bird cages – Provides a protected yet visible fairy environment
- Hollow tree stumps – Creates an authentic woodland setting
I once transformed my grandmother’s cracked ceramic bowl into a stunning fairy garden centerpiece. Rather than tossing it out, the crack became part of the charm—a perfect spot for a tiny staircase leading to a lower level of the garden.
Pro Tip: Always ensure your container has drainage if you’re using live plants. I learned this the hard way when my first fairy garden became waterlogged after a heavy rain, drowning my carefully selected plants!
3. Crafting Your Own Fairy Houses
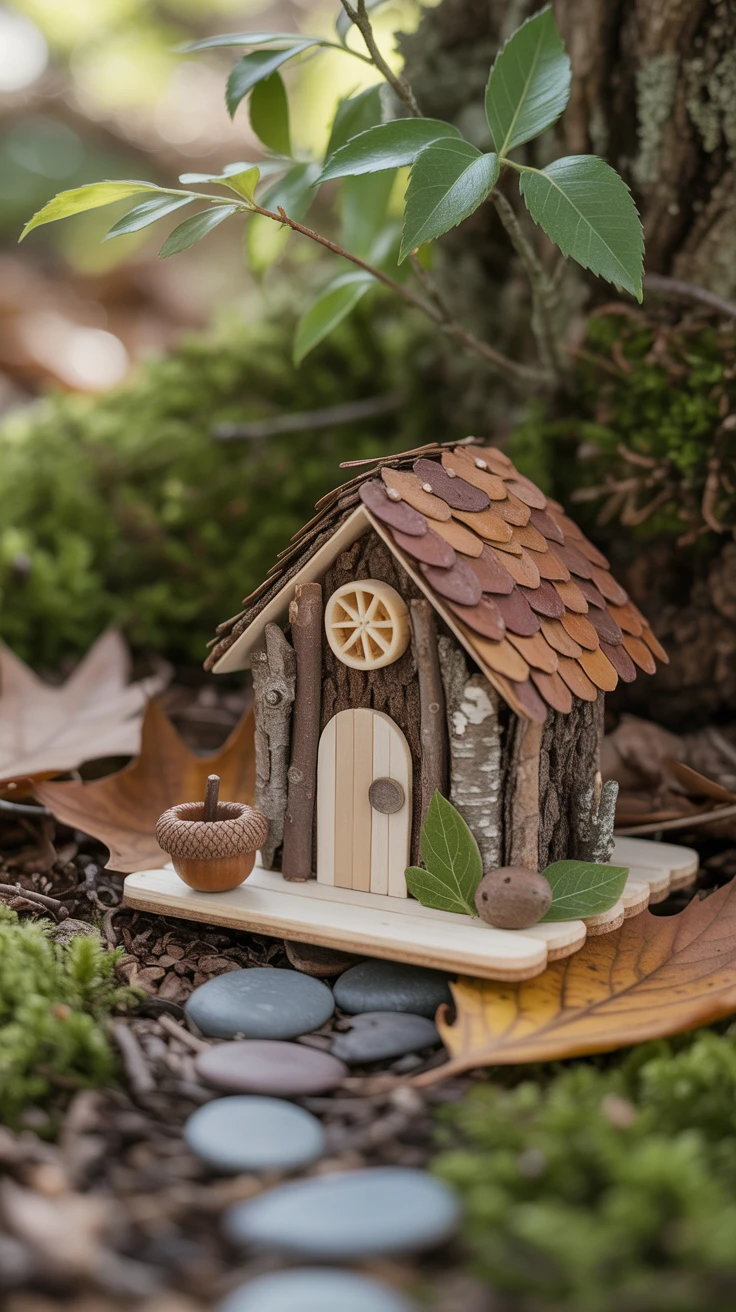
Creating a fairy house was intimidating to me at first, but I’ve discovered that simple materials can yield charming results. The fairy house becomes the focal point of your garden, so it’s worth spending a little extra time on this element.
Materials for DIY Fairy Houses:
- Twigs, bark, and small branches
- Air-dry clay (for foundations or details)
- Acorn caps (perfect for tiny bowls or hats)
- Popsicle sticks (for structure and furniture)
- Pine cones (can become fairy towers)
- Small stones and pebbles
- Hot glue gun or waterproof craft glue
My first fairy house was a simple twig structure with a bark roof, but it had so much character! I’ve since experimented with more complex designs, but there’s something special about those rustic, natural homes that seem to have grown organically from the garden itself.
Pro Tip: If placing your fairy garden outdoors, seal wooden elements with a clear, non-toxic waterproof sealer to extend their life. I once spent hours on a beautiful fairy house only to watch it disintegrate after the first rainfall!
4. Embrace Nature with Natural Elements
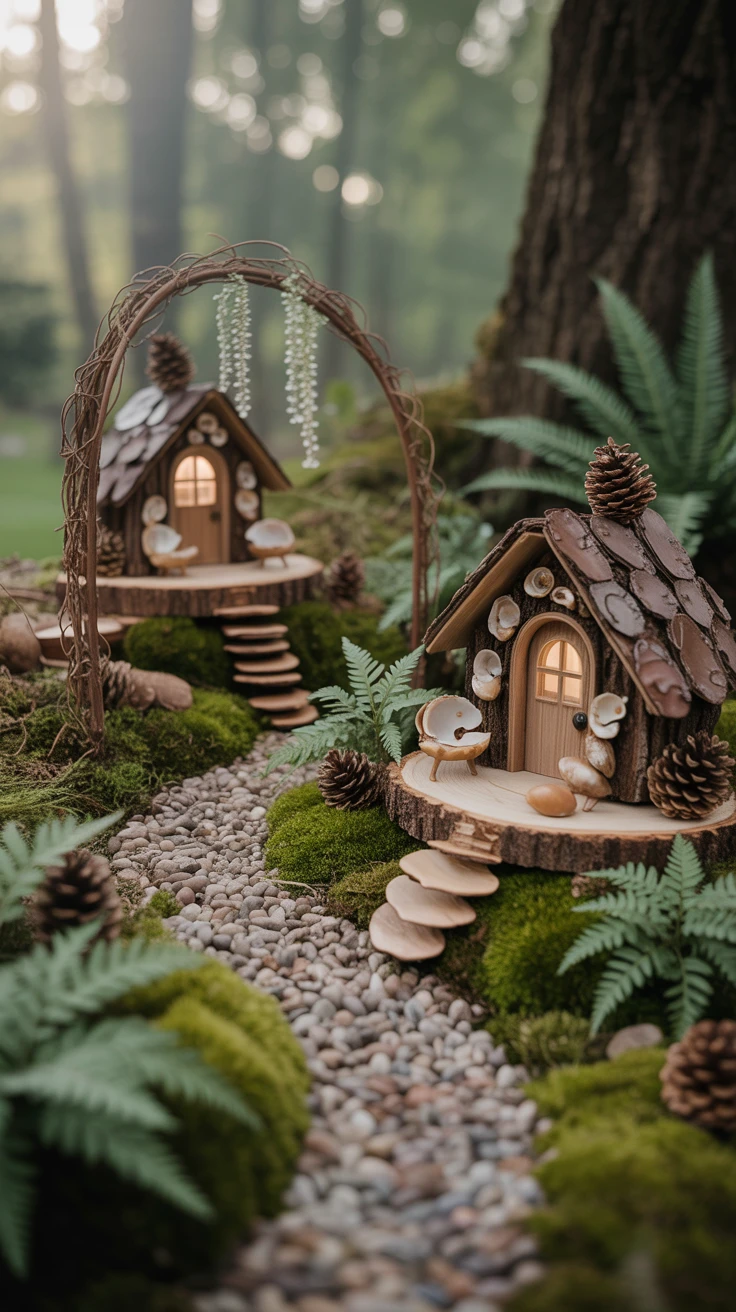
Incorporating natural elements creates authenticity in your fairy garden. I’ve spent countless hours collecting tiny treasures on nature walks that later became perfect additions to my DIY fairy garden ideas.
- Pebbles and small stones – Create pathways, borders, or fairy “stepping stones”
- Twigs and small branches – Form natural fences, bridges, or arbors
- Bark pieces – Make excellent roofing material or rustic signage
- Pinecones – Can become trees or decorative elements
- Seashells – Perfect for fairy bathtubs or garden accents
- Acorns and nuts – Become furniture, containers, or decorative elements
Creating a pebble pathway through my fairy garden was a simple addition that transformed the entire space. It guided the eye through the garden and created a sense of journey and exploration that visitors—both human and fairy—could follow.
Pro Tip: Clean natural materials before adding them to your garden. I soak my collected items in a mild vinegar solution to remove any insects or mold that might harm my plants.
5. Illuminate with Magical Lighting
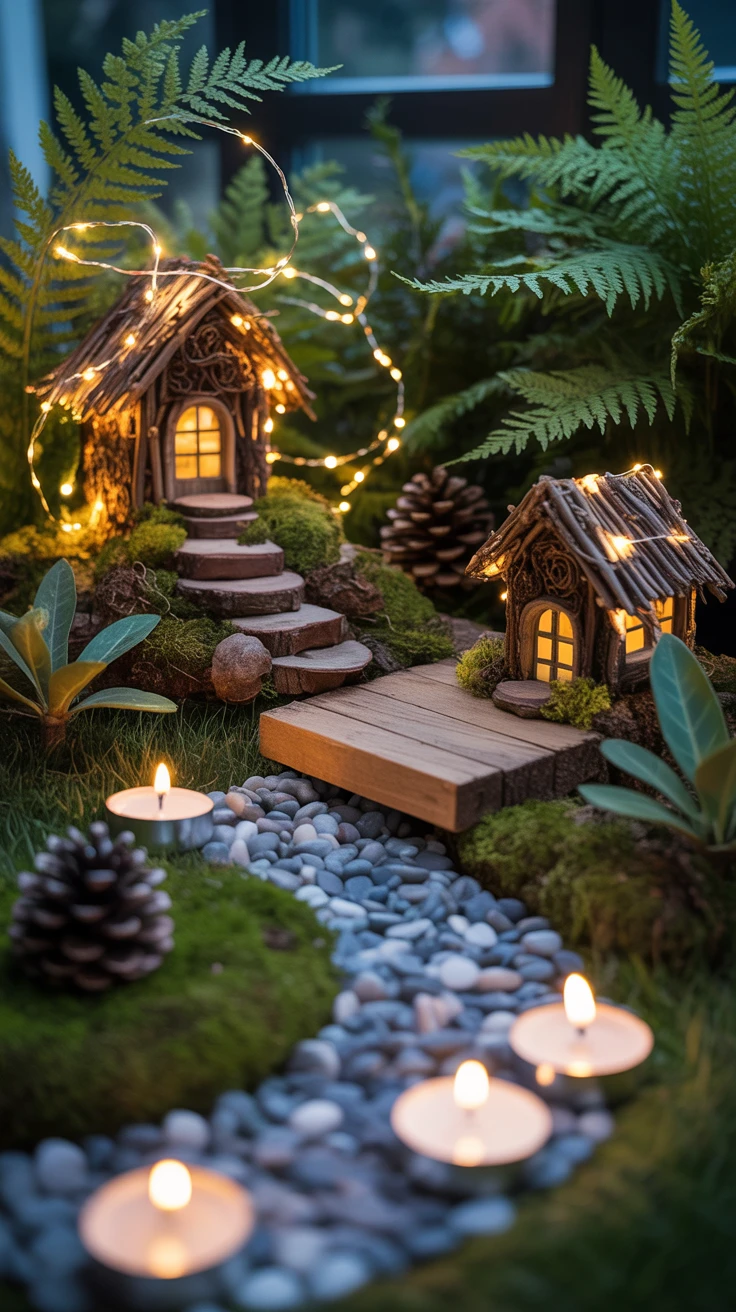
Adding light to your fairy garden transforms it from charming to magical, especially in the evening hours. The first time I added tiny lights to my garden, it created such a magical atmosphere that even skeptical friends were enchanted!
- Miniature LED string lights – Can be woven through plants or around structures
- Solar-powered fairy lights – Perfect for outdoor gardens with no need for batteries
- Tea light candles – Create a warm glow (use with caution and supervision)
- Glow-in-the-dark paint – Apply to stones or decorative elements for subtle illumination
- Glow-in-the-dark pebbles – Create magical pathways that light up at night
I once created a “fairy festival” scene with tiny paper lanterns illuminated by the smallest LED lights I could find. The effect was so enchanting that I kept the garden lit every evening for weeks.
Pro Tip: If using electrical lighting, ensure all connections stay dry by using weatherproof options or bringing your garden indoors during wet weather. Safety first—even in magical realms!
6. Accessorize for Fun and Flair
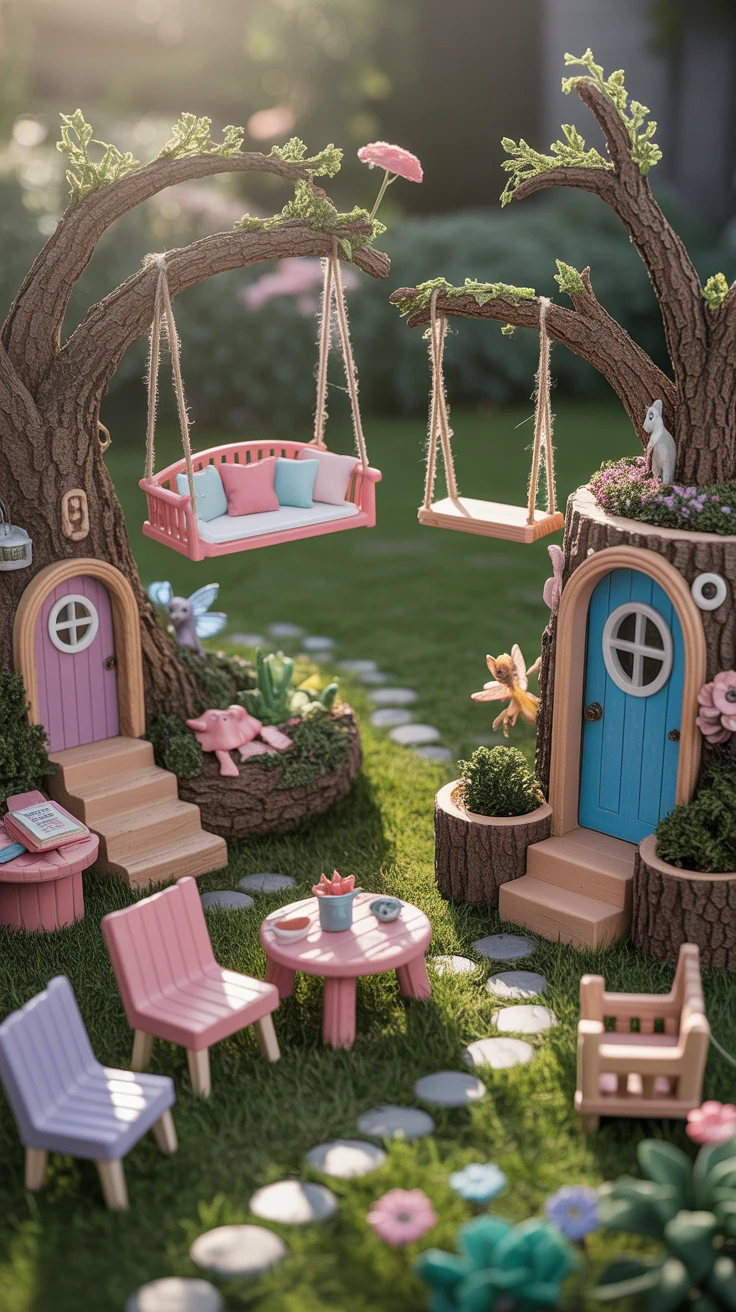
Accessories bring your fairy garden to life with personality and story. This is where your homemade DIY fairy garden truly becomes unique to you. Some of my most treasured fairy garden elements are tiny items I’ve crafted myself.
- Miniature furniture – Tiny benches, tables, and chairs create living spaces
- Fairy doors – Attached to tree trunks or containers suggest fairy homes
- Tiny swings or hammocks – Add playfulness and whimsy
- Miniature gardening tools – Suggest that fairies tend their own gardens
- Tiny books or scrolls – Add a storytelling element
- Miniature animals – Create a sense of a complete fairy ecosystem
One of my favorite accessories was a tiny clothesline I made with toothpicks and thread, hanging miniature handkerchiefs made from scraps of fabric. These personal touches create stories within your garden—who hung those clothes? What adventures were they having?
Pro Tip: Scale is important for a cohesive look. I keep a ruler nearby when crafting accessories to ensure everything remains proportional to my fairy figurines.
7. Change with the Seasons
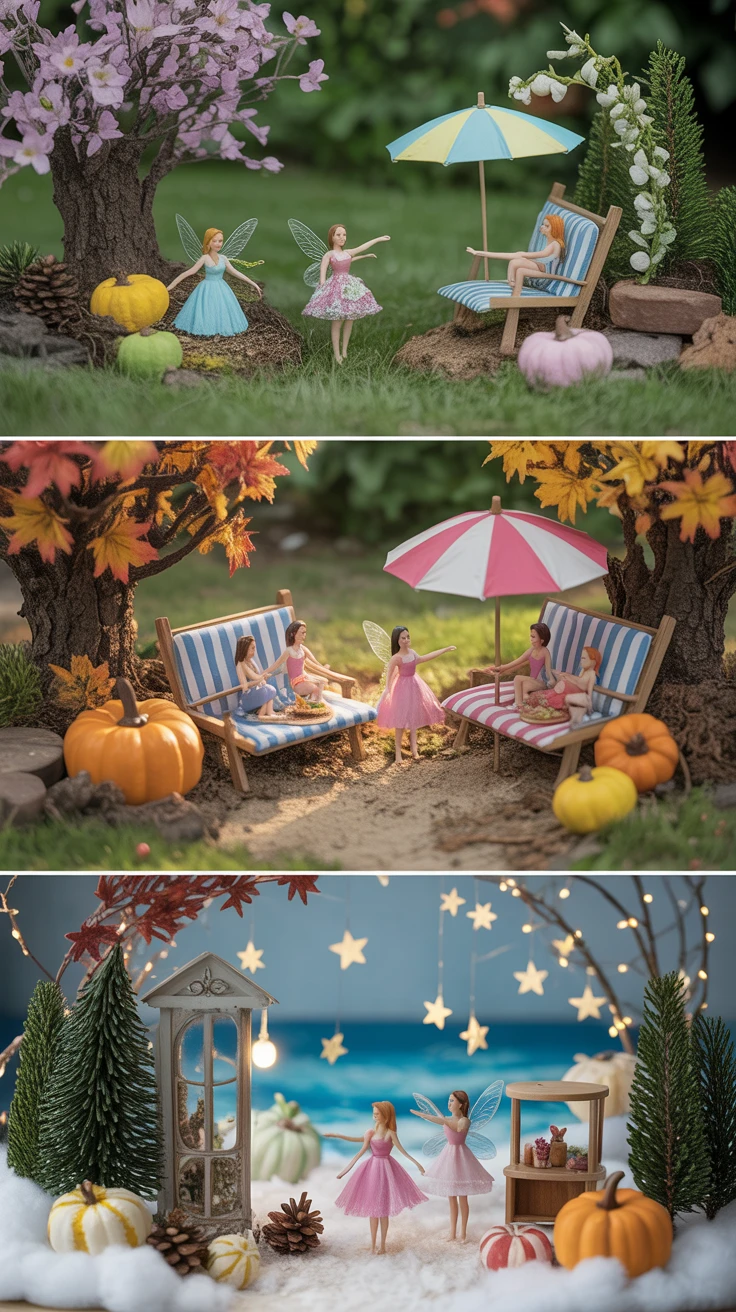
Keeping your fairy garden fresh and interesting throughout the year extends the joy it brings. Seasonal themes have allowed me to continuously reimagine my fairy worlds without starting from scratch.
- Spring – Add tiny flower buds, pastel colors, and “rain” elements like mini umbrellas
- Summer – Include miniature beach scenes, tiny gardening elements, or fairy picnics
- Fall – Incorporate tiny pumpkins, colored leaves, and harvest themes
- Winter – Create snowy scenes with cotton batting, miniature evergreens, and holiday decorations
- Special occasions – Celebrate birthdays, holidays, or other events with themed decorations
My winter fairy garden transformation is always my favorite—tiny wreaths, miniature gift packages, and a dusting of artificial snow completely change the garden’s character without requiring a complete redesign.
Pro Tip: Store seasonal fairy garden accessories in labeled containers so you can easily swap them out when the time comes. I use small craft organizers with dividers to keep everything sorted and protected.
Pro Tips for Creating Stunning Fairy Gardens
After years of creating fairy gardens, I’ve learned some valuable lessons that can help beginners avoid common pitfalls:
- Create depth by using varying heights—raised areas at the back and lower elements in front create perspective
- Less is more—overcrowding can make your garden look cluttered rather than magical
- Consider maintenance when designing—leave enough space to water plants and remove debris
- Take photos of arrangements you love before changing seasons—this helps you recreate favorite elements later
- Join online communities dedicated to fairy gardening for inspiration and troubleshooting
Begin Your Enchanting Journey
Creating homemade DIY fairy gardens has brought me countless hours of joy and creativity. There’s something deeply satisfying about crafting a miniature world where imagination can flourish. I’ve found that these tiny gardens not only beautify my home but also serve as conversation starters and stress relievers.
Remember, there are no strict rules in fairy gardening—only the limits of your imagination. Whether you’re creating a simple fairy scene in a teacup or an elaborate multi-level garden in your backyard, the magic lies in the process as much as the result. So gather your materials, channel your inner child, and begin creating your own enchanted world today!
Frequently Asked Questions
What are some easy plants for a beginner’s fairy garden?
Succulents, moss, baby’s tears, and small ferns are excellent choices for beginners. Succulents require minimal watering, while moss creates an instant lush effect. Choose slow-growing varieties that won’t quickly outgrow your miniature landscape.
How do I maintain my fairy garden?
Regular maintenance includes gentle watering (being careful not to disturb arrangements), pruning plants as needed, removing debris, and occasionally refreshing soil. Indoor fairy gardens typically need less maintenance than outdoor ones, which may require seasonal adjustments and weather protection.
Can I keep a fairy garden indoors year-round?
Absolutely! Indoor fairy gardens thrive on windowsills, tabletops, or shelves that receive appropriate light for your chosen plants. Use a container with drainage or create a drainage layer with pebbles at the bottom. Indoor gardens also allow you to use materials that might not withstand outdoor conditions.
How often should I water my fairy garden?
Watering frequency depends on your plant selection, container type, and environment. Generally, check the soil moisture weekly by touching the top inch of soil—if it feels dry, it’s time to water. Succulents need less frequent watering than moss or ferns. Always water gently using a small watering can or spray bottle to avoid disturbing your miniature landscape.
What should I do if my fairy garden plants look unhealthy?
First, assess whether you’re over or under-watering, as these are the most common issues. Check for adequate drainage and appropriate light conditions. Remove any diseased plants promptly to prevent spread to healthy ones. Sometimes, plants simply outgrow the fairy garden scale—don’t hesitate to replace them with smaller specimens to maintain the miniature aesthetic.